
Water Heater Element Diagnostic Tool
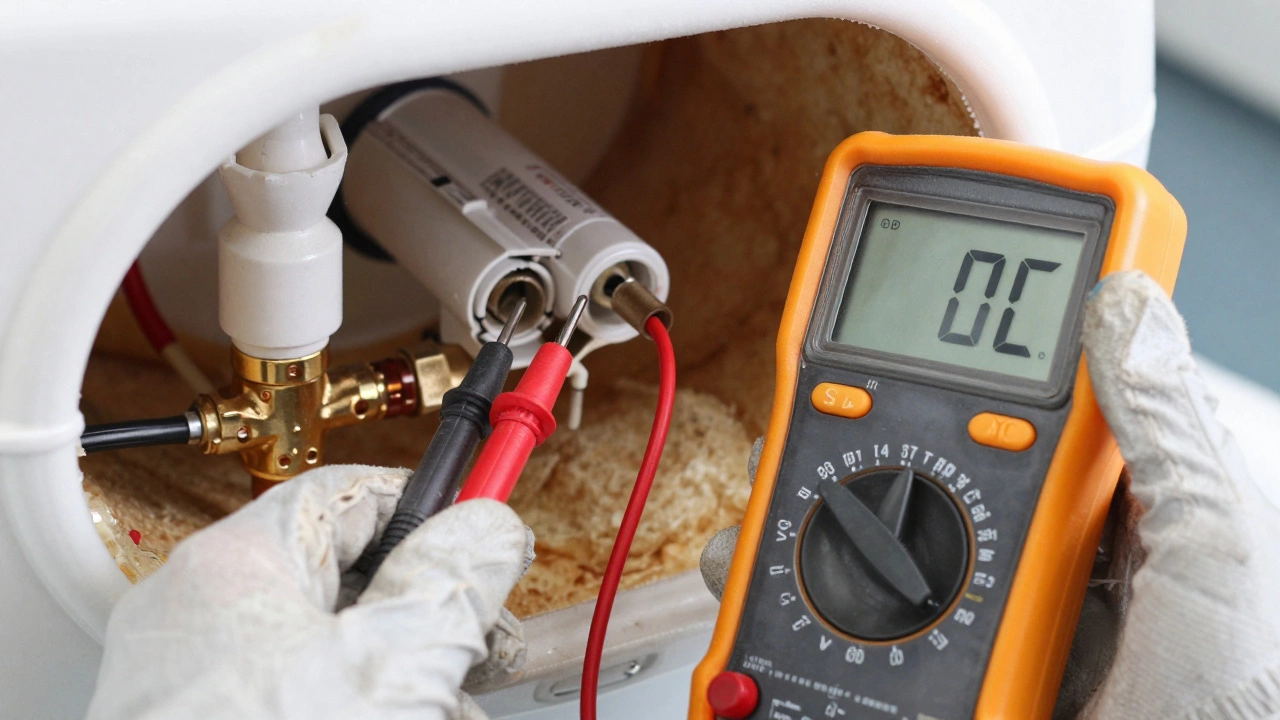
Ensure power is OFF. Set multimeter to Ohms (Ω). Place probes on the two brass terminals of the element.
Enter your reading above to check the status of your heating element.
You turn on the shower, expecting a warm rinse after a long day, but only cold water comes out. Or worse, you get a few seconds of lukewarm water before it drops to freezing. Before you call an expensive technician or decide it’s time to buy a brand-new unit, there is a high chance your hot water heater element has failed. This is one of the most common issues in electric water heaters, and fixing it yourself can save you hundreds of dollars.
In this guide, we will walk through exactly how to spot a bad element, how to test it safely with a multimeter, and what to do if you find that it is indeed the culprit. We’ll also cover why elements fail and when it might be better to replace the whole tank rather than just the part.
The Top Signs Your Heating Element Has Gone Bad
Electric water heaters usually have two heating elements: an upper one and a lower one. The upper element heats the top section of the tank first, while the lower element kicks in to heat the bottom once the top is done. When one or both fail, the symptoms are distinct. Here is what to look for.
- No hot water at all: If your tank is completely cold, both elements might be dead, or the power supply (thermostat or breaker) is cut. However, if you recently replaced the thermostat and still have no heat, the elements are likely burnt out.
- Only a small amount of hot water: This is the classic sign of a single-element failure. If the upper element works but the lower one doesn’t, you’ll get enough hot water for a quick hand wash or short shower, but it runs out fast because the bulk of the water in the tank isn’t being heated.
- Hot water takes forever to recover: If you use hot water and then wait several hours, and it’s still not fully hot, the working element might be struggling, or the second element is partially failing.
- Burning smell or tripped breakers: A bad element can sometimes short circuit, causing the breaker to trip repeatedly or emitting a faint burning odor from the electrical panel or the heater access panel.
- Rust-colored water: While this often points to a corroded tank, a severely corroded element can also shed rust particles into your water supply.
If you recognize any of these signs, don’t panic. It’s rarely an emergency unless there is visible water leaking from the tank itself. Electrical issues require caution, but they are manageable if you follow safety protocols.
Safety First: Turning Off Power and Water
Before you touch anything inside your water heater, you must cut the power. Electric water heaters operate at 240 volts, which is lethal. Do not skip this step.
- Turn off the electricity: Go to your main fuse box or circuit breaker panel. Find the switch labeled “Water Heater” and flip it to the OFF position. To be absolutely sure, take a non-contact voltage tester to the breaker slot to confirm there is no live current.
- Shut off the cold water supply: Locate the cold water inlet valve near the top of the tank and turn it clockwise until it stops. This prevents more water from entering the tank while you work.
- Relieve pressure and drain slightly: Open a hot water faucet somewhere in your house (like a kitchen sink) to relieve pressure. Then, attach a garden hose to the drain valve at the bottom of the tank and run it to a floor drain or outside. Open the drain valve just enough to let out a few gallons. You don’t need to empty the tank completely; you just need the water level to drop below the heating element you are testing (usually the lower one). This allows air into the tank so you can remove the element without creating a vacuum lock.
Once the water level is low and the power is confirmed off, you can proceed to inspect the elements.
How to Test a Water Heater Element with a Multimeter
Visual inspection can tell you if an element looks rusty or pitted, but it won’t tell you if the internal coil is broken. For that, you need a multimeter. This tool measures electrical resistance, and a healthy element should show a specific range of ohms.
Here is the step-by-step process:
- Remove the access panels: Use a screwdriver to remove the metal covers over the thermostats and elements. Pull back the insulation foam carefully.
- Disconnect the wires: Note where each wire goes (take a photo with your phone if needed). Unscrew the terminal screws on the thermostat to detach the wires connected to the element. Leave the wires hanging free so they don’t touch the metal tank.
- Set your multimeter: Turn the dial to the Ohms (Ω) setting. If it’s an analog meter, zero it out. If digital, ensure it reads close to zero when probes touch.
- Test for continuity: Place one probe on one of the brass terminals of the heating element and the other probe on the second terminal. Do not touch the center rod with the probes.
| Reading | Meaning | Action |
|---|---|---|
| 900-1600 Ohms | Healthy Element | Reconnect wires. Check thermostat next. |
| Infinity (OL or 1) | Open Circuit (Bad) | Replace the heating element. |
| 0 Ohms | Short Circuit (Bad) | Replace the heating element immediately. |
A standard 4500-watt element should read around 13-14 ohms. A 5500-watt element will read lower, around 10-11 ohms. If your reading is anywhere between 900 and 1600 ohms, the element is technically fine. If it reads infinity (often displayed as “OL” on digital meters), the internal coil is broken, and the element is dead. If it reads zero, it’s shorted, which is dangerous and requires replacement.
Testing for Ground Faults
Even if the element shows correct resistance, it could still be faulty if it is grounding out. This happens when the magnesium coating wears off, and the metal casing touches the water or the tank wall. This causes breakers to trip.
To test for this, keep one probe on one of the brass terminals and move the other probe to the bare metal shell of the element (the threaded part that screws into the tank). The meter should read infinity (no continuity). If it shows any resistance or completes a circuit, the element is grounded and must be replaced. Running a grounded element can shock you or damage your home’s wiring.
Why Do Heating Elements Fail?
Understanding why elements die can help you extend the life of your next one. There are three main culprits:
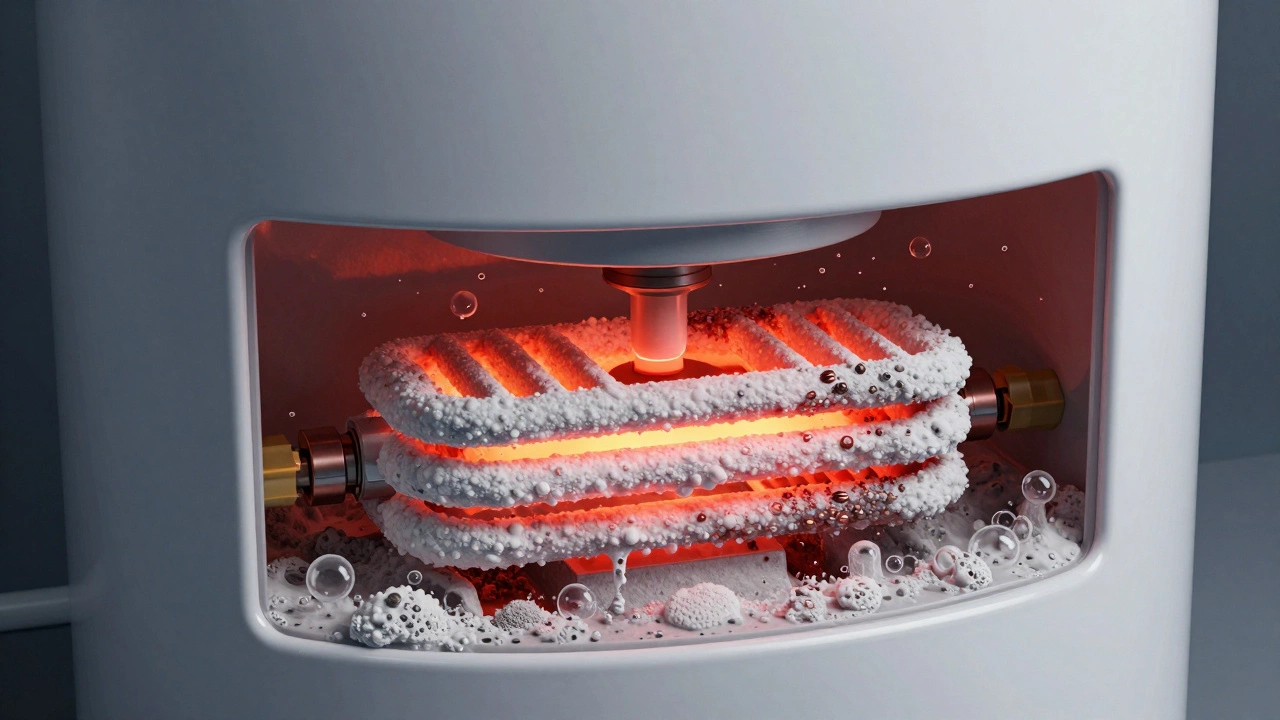
- Scale and Sediment Buildup: In areas with hard water, minerals like calcium and magnesium settle at the bottom of the tank. Over time, this forms a thick layer of scale on the heating element. The element tries to heat the water, but instead, it superheats the mineral crust. This overheating burns out the internal coil prematurely. Flushing your tank annually can prevent this.
- Dry Firing: If the water level in the tank drops below the element (due to a leak or improper draining), the element can heat up without water to absorb the heat. This destroys the element in minutes. Always ensure the tank is full before turning the power back on.
- Age and Wear: Most heating elements last between 3 to 5 years. Like lightbulbs, they eventually burn out due to normal thermal cycling. If your water heater is older than 8 years, frequent element replacements might signal that the tank itself is nearing the end of its life.
Replacing the Element: What You Need to Know
If your tests confirm a bad element, replacing it is a straightforward DIY job if you are comfortable with basic tools. You will need a new element (match the wattage and voltage of the old one), a wrench, Teflon tape, and possibly dielectric unions.
Unscrew the old element using a large wrench or socket. Be prepared for some water to spill out, so have towels ready. Clean the opening in the tank to remove any old sealant or corrosion. Wrap the threads of the new element with Teflon tape (clockwise) to ensure a watertight seal. Screw it in tightly, but avoid overtightening, which can crack the glass lining of the tank.
Reconnect the wires exactly as they were. Reinstall the insulation and access panels. Close the drain valve, turn the cold water supply back on, and open a hot water faucet to bleed air from the system. Once water flows steadily from the faucet, close it. Finally, restore power at the breaker box. Wait a few hours for the tank to heat up and check if the problem is resolved.
When to Call a Professional or Replace the Tank
While changing an element is cheap, consider the age of your water heater. If your unit is more than 10 years old, spending $50-$100 on parts and labor might not be worth it. An aging tank is prone to leaks, which can cause significant water damage. In such cases, replacing the entire water heater is a smarter long-term investment.
Also, if you are unsure about handling 240-volt electricity, or if the element is seized and won’t budge, call a licensed plumber. Forcing a stuck element can crack the tank, turning a simple repair into a catastrophic flood.
How much does it cost to replace a hot water heater element?
The part itself typically costs between $30 and $70 depending on the wattage and brand. If you hire a professional plumber, expect to pay between $150 and $300 for labor and parts combined. Doing it yourself saves significantly on labor costs.
Can I use a gas water heater element in an electric one?
No. Gas and electric water heaters operate on completely different principles. Electric models use immersion heating elements powered by electricity, while gas models use a burner and pilot light. They are not interchangeable.
Why does my water heater trip the breaker every time I turn it on?
This is usually caused by a short circuit in the heating element or a faulty thermostat. It could also indicate that water has gotten into the electrical connections. Do not keep resetting the breaker; this is a fire hazard. Test the element for ground faults or call an electrician.
How long does a water heater element last?
On average, a heating element lasts between 3 to 5 years. However, this varies greatly based on water quality. Hard water with high mineral content can reduce lifespan to under 2 years due to scale buildup, while soft water areas may see elements last 7+ years.
Do I need to empty the tank to change the element?
You do not need to empty the entire tank. You only need to drain enough water so that the level is below the element you are removing. Draining the lower element requires lowering the water level significantly, while the upper element can often be accessed with minimal draining.
What is the difference between upper and lower heating elements?
The upper element heats the top portion of the tank first for quick access to hot water. The lower element maintains the temperature of the rest of the tank. The upper element usually fails less frequently because it is exposed to cooler incoming water less directly than the lower one, which sits in sediment-heavy zones.
I am an expert in the services industry with a focus on appliance repair. My passion lies in understanding how things work and educating others in simple, engaging ways. This enthusiasm fuels my writing, where I delve into topics around appliance maintenance and troubleshooting. I aim to make these subjects clear and accessible to all readers.