Water Heater Leak Diagnostic Tool
T&P Valve
Top/Side with pipePipe Connections
Inlet/Outlet jointsDrain Valve
Bottom of tankTank Body
Center/SeamsTankless Unit
Condensate panDiagnosis
Description goes here.
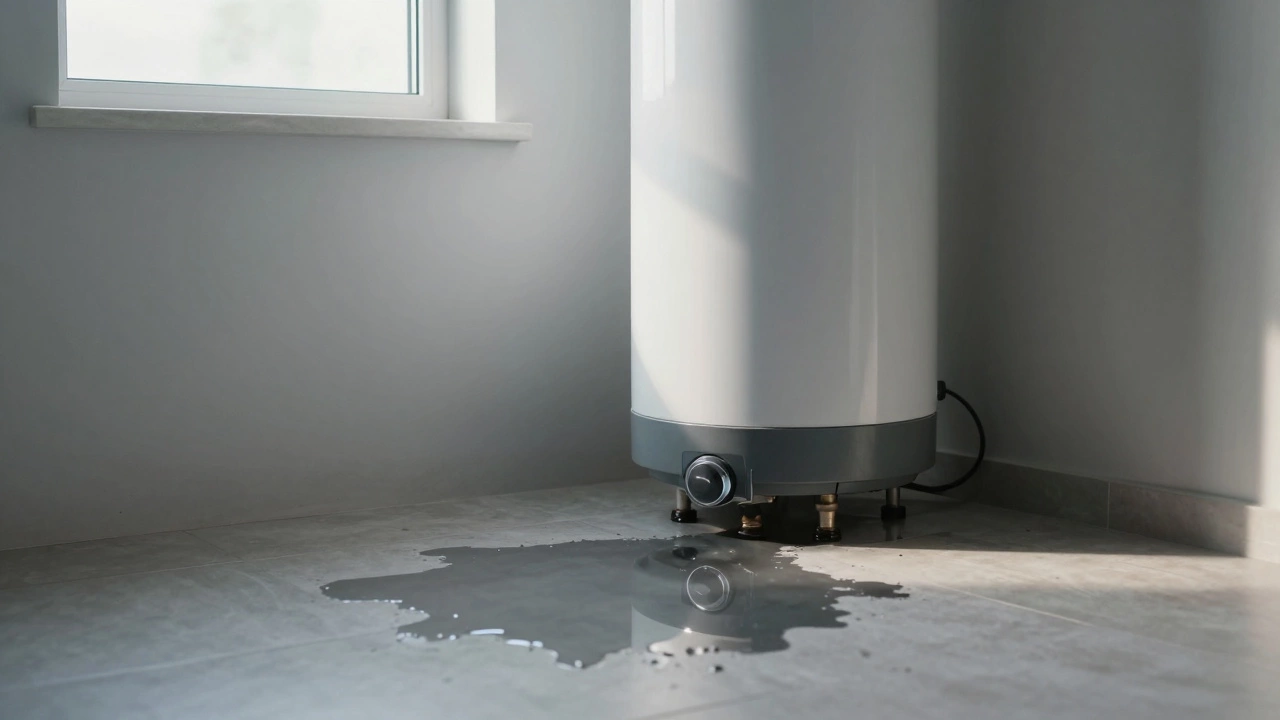
Waking up to a puddle of water near your utility closet is one of the most stressful home maintenance surprises. You might wonder if your entire unit has failed or if it’s just a loose connection. The truth is, water heaters are plumbing appliances that heat and store water for household use. They operate under high pressure and temperature, making them prone to specific failure points. Knowing exactly where these leaks originate saves you from unnecessary panic and costly mistakes.
Most leaks do not come from the middle of the tank itself. If they did, the tank would likely be corroded through, requiring immediate replacement. Instead, the majority of issues stem from connections, valves, or internal components that can often be repaired. By identifying the source quickly, you can stop water damage before it ruins your flooring or drywall.
The Temperature and Pressure Relief Valve (T&P Valve)
One of the most common culprits for dripping is the Temperature and Pressure Relief Valve (also known as a T&P valve or safety valve). This device is designed to open if the water inside the tank gets too hot or the pressure builds up dangerously high. It usually sits on the top side of the tank and has a discharge pipe leading down toward the floor.
If you see water pooling near the base of this pipe, check the valve first. Sometimes, mineral buildup causes the valve to stick slightly open, resulting in a slow drip. Other times, the valve is doing its job because your thermostat is set too high or your home’s water pressure is excessive. You can test this by lifting the lever on the valve briefly. If water sprays out strongly and then stops, the valve is working correctly. If it continues to drip after you lower the lever, the valve may need cleaning or replacement. Ignoring a leaking T&P valve is risky because it indicates your system is under stress.
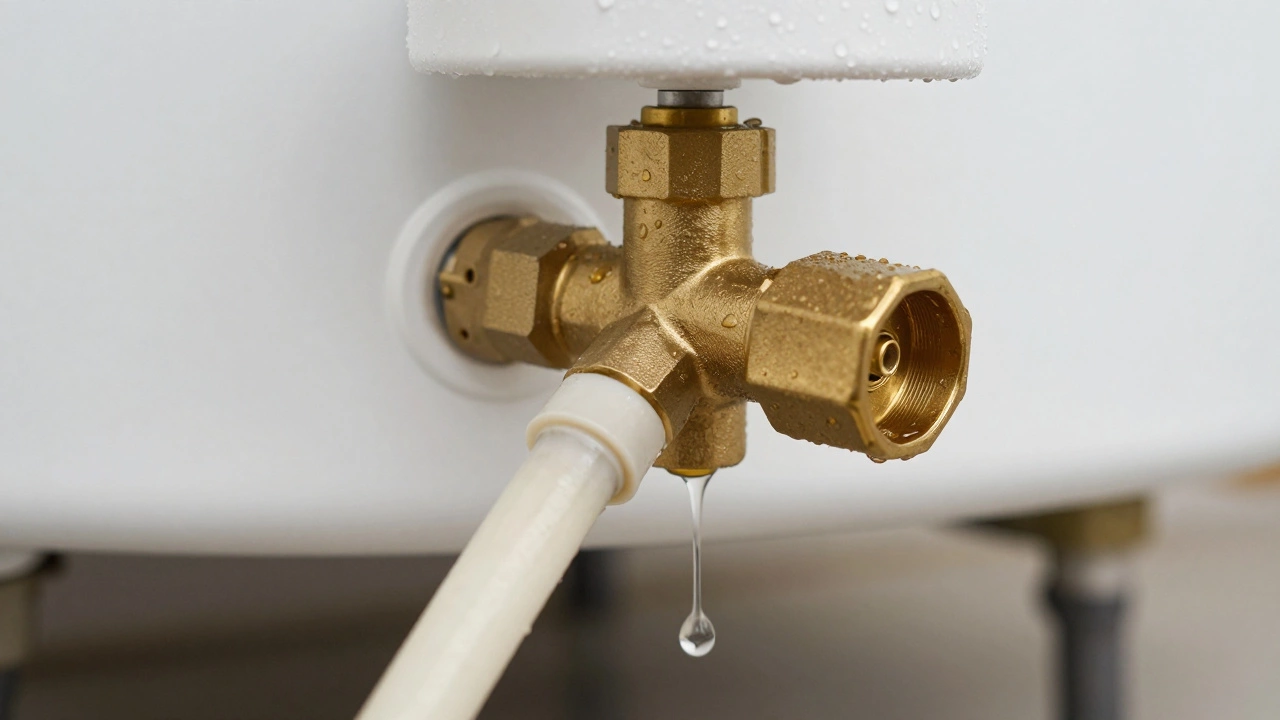
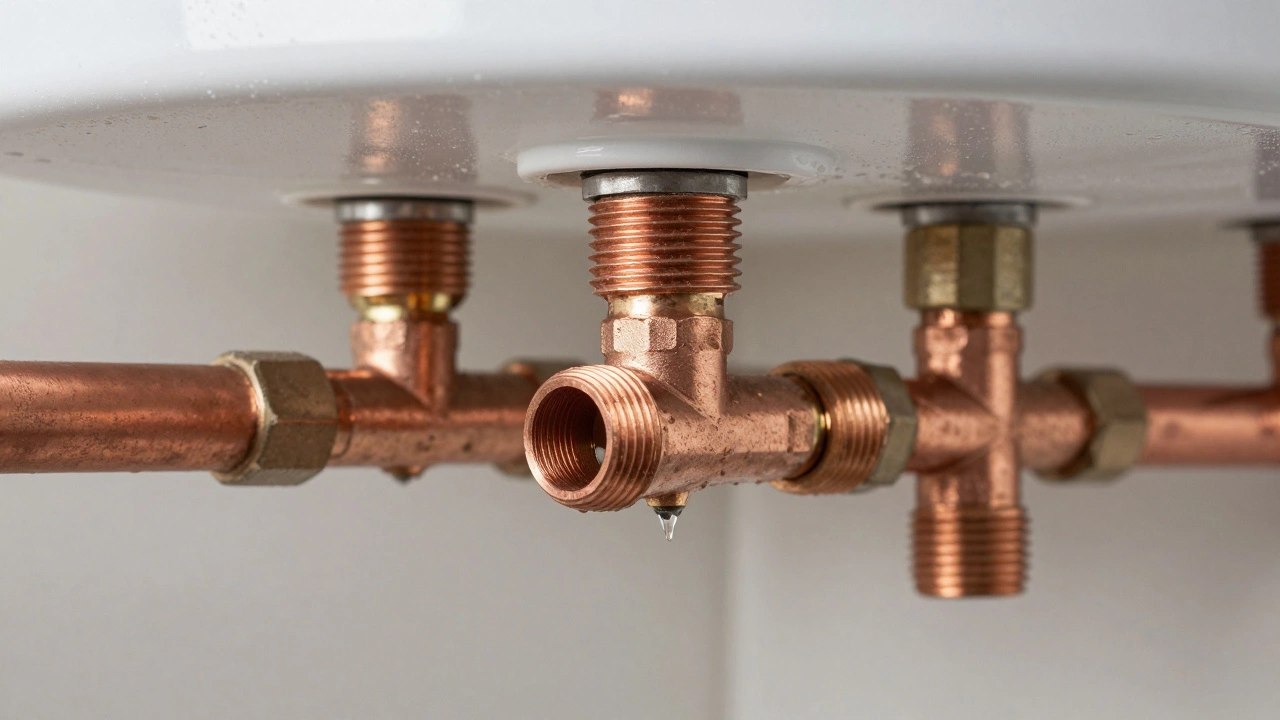
Inlet and Outlet Pipe Connections
Before assuming the tank is broken, look at the pipes connecting to it. There are two main copper or flexible metal pipes: the cold water inlet (usually blue tag) and the hot water outlet (usually red tag). These connections use threaded fittings sealed with tape or compound. Over time, vibration from the heating elements or expansion and contraction of the pipes can loosen these threads.
A leak here often looks like water running down the side of the tank, tricking people into thinking the tank itself is cracked. To diagnose this, dry the area thoroughly with a towel. Then, watch closely. If the moisture reappears specifically at the elbow joints where the pipes meet the tank nipples, you likely just need to tighten the fitting or apply new plumber’s tape. This is a simple fix that doesn’t require replacing the entire unit. However, if the pipes are old galvanized steel, they might be corroding internally, which requires more extensive plumbing work.
Drain Valve Leaks
Near the bottom of the tank, you’ll find the drain valve. Its purpose is to let you empty the tank for maintenance or replacement. Because it sits low, gravity pulls any escaping water directly onto the floor, creating a significant mess. A leaking drain valve is often caused by debris settling around the valve seat or a worn-out rubber gasket.
Sediment from hard water accumulates at the bottom of the tank over years. This grit can get lodged in the drain valve mechanism, preventing it from sealing tightly. You might notice rust-colored water when you flush the tank, which confirms sediment buildup. In many cases, flushing the tank thoroughly removes the debris and stops the leak. If the valve body itself is corroded, you may need to replace the valve. While this is cheaper than a new tank, it carries a risk: if the tank is old, opening the drain valve might expose a hole in the tank floor, signaling end-of-life.
Internal Tank Corrosion
If the water is seeping from the center of the tank or between the inner lining and the outer steel shell, you are dealing with internal corrosion. This is the most serious type of leak. Inside the tank, an anode rod protects the steel tank from rusting by sacrificing itself. When this rod depletes, the water begins to eat away at the steel walls.
You cannot repair a corroded tank. Welding or patching it is unsafe due to the pressure and heat involved. If you see bubbles rising in the tank (visible through the glass sight glass on some models) or constant weeping from seams, the tank has failed. At this stage, replacement is the only option. Delaying action risks catastrophic rupture, which can release hundreds of gallons of hot water instantly, causing severe scalding hazards and structural water damage.
Condensation vs. Leaks in Tankless Units
If you have a modern tankless water heater, it heats water on demand without a storage tank. These units don’t have a large reservoir to leak from, but they still produce moisture. In humid climates or during summer months, condensation forms on the cold water pipes connected to the unit. This can look exactly like a leak.
To distinguish condensation from a real leak, touch the wet area. If it feels cool and the water is clear, it’s likely condensation. Insulating the cold water lines solves this problem. However, tankless units have condensate drains if they are gas-powered. If the PVC drain line clogs with algae or sludge, acidic condensate will back up and spill out. Check the drain pan and hose regularly to prevent overflow.
| Leak Location | Likely Cause | Repair Difficulty | Action Required |
|---|---|---|---|
| T&P Valve Discharge Pipe | High pressure/temperature or stuck valve | Easy | Test valve; replace if faulty |
| Pipe Connections (Top) | Loose fittings or worn sealant | Easy | Tighten fittings; re-apply tape |
| Drain Valve (Bottom) | Sediment blockage or bad gasket | Moderate | Flush tank; replace valve if needed |
| Center of Tank | Internal corrosion/rust | Impossible | Replace entire water heater |
| Base Pan (Tankless) | Clogged condensate drain | Easy | Clear drain line; clean pan |
How to Diagnose the Source Quickly
When you suspect a leak, follow this step-by-step process to pinpoint the issue safely:
- Turn off the power. For electric units, switch off the breaker. For gas units, turn the dial to "Pilot." This prevents burns and electrical shocks while you inspect wet areas.
- Dry the area completely. Use towels to remove all standing water and wipe down the tank and pipes. Dryness is essential for accurate observation.
- Place paper towels. Put folded paper towels under suspected leak points: the T&P valve, pipe connections, and the drain valve. Paper absorbs water faster than cloth and shows exactly where the drip starts.
- Wait and observe. Leave the house for an hour if possible. Return and check which paper towel is wet. This isolates the source without guessing.
- Check the age. If your unit is over 10-12 years old, even a small leak suggests impending failure. Consider budgeting for a replacement rather than repeated repairs.
Ignoring minor drips leads to major disasters. A small leak at the drain valve might seem harmless, but if it worsens overnight, it could flood your basement. Proactive monitoring extends the life of your appliance and protects your home’s structure.
Can I fix a leaking water heater myself?
You can fix minor leaks from loose pipe connections, a stuck T&P valve, or a clogged drain valve. These involve tightening fittings, cleaning debris, or replacing inexpensive parts. However, if the tank itself is leaking from the center or seams, you must replace the entire unit. DIY repairs on internal tanks are unsafe and void warranties.
Why is my water heater leaking from the top?
Leaks from the top usually come from the cold water inlet, hot water outlet, or the T&P valve. Loose connections are the most common cause. Tighten the fittings carefully. If the T&P valve is dripping, it may indicate high pressure. Install a pressure-reducing valve if your home’s water pressure exceeds 80 PSI.
Is it safe to keep using a leaking water heater?
It depends on the leak source. Minor drips from valves or pipes are generally safe to monitor temporarily while you arrange repairs. However, leaks from the tank body mean the structural integrity is compromised. Using it risks sudden rupture, scalding injuries, and extensive water damage. Turn off power and gas immediately if the tank is leaking.
How long does a water heater last before leaking?
Traditional tank water heaters typically last 8 to 12 years. Tankless models can last 20 years or more with proper maintenance. Frequent flushing to remove sediment and checking the anode rod every few years can extend lifespan. Once a unit starts leaking from the tank, it is near the end of its useful life regardless of age.
What causes a water heater to leak from the bottom?
Bottom leaks often originate from the drain valve or the tank floor. Sediment buildup can prevent the drain valve from sealing. If the leak is from the tank floor itself, it indicates internal corrosion. This is irreversible and requires full replacement. Always check the drain valve first before condemning the tank.
I am an expert in the services industry with a focus on appliance repair. My passion lies in understanding how things work and educating others in simple, engaging ways. This enthusiasm fuels my writing, where I delve into topics around appliance maintenance and troubleshooting. I aim to make these subjects clear and accessible to all readers.