Oven Control Board Diagnostic Tool
Answer the following questions about your oven's behavior. This tool will guide you through a logical elimination process to identify the most likely cause of your problem.
When you turn on the stove/oven, does the display light up? Do any buttons light up?
Does the oven heat at all when set to Bake or Broil?
If using an independent oven thermometer, is the temperature accurate (within +/- 25°F)?
Are there flashing error codes (e.g., F9, E6), random beeping, or does the oven turn on by itself?
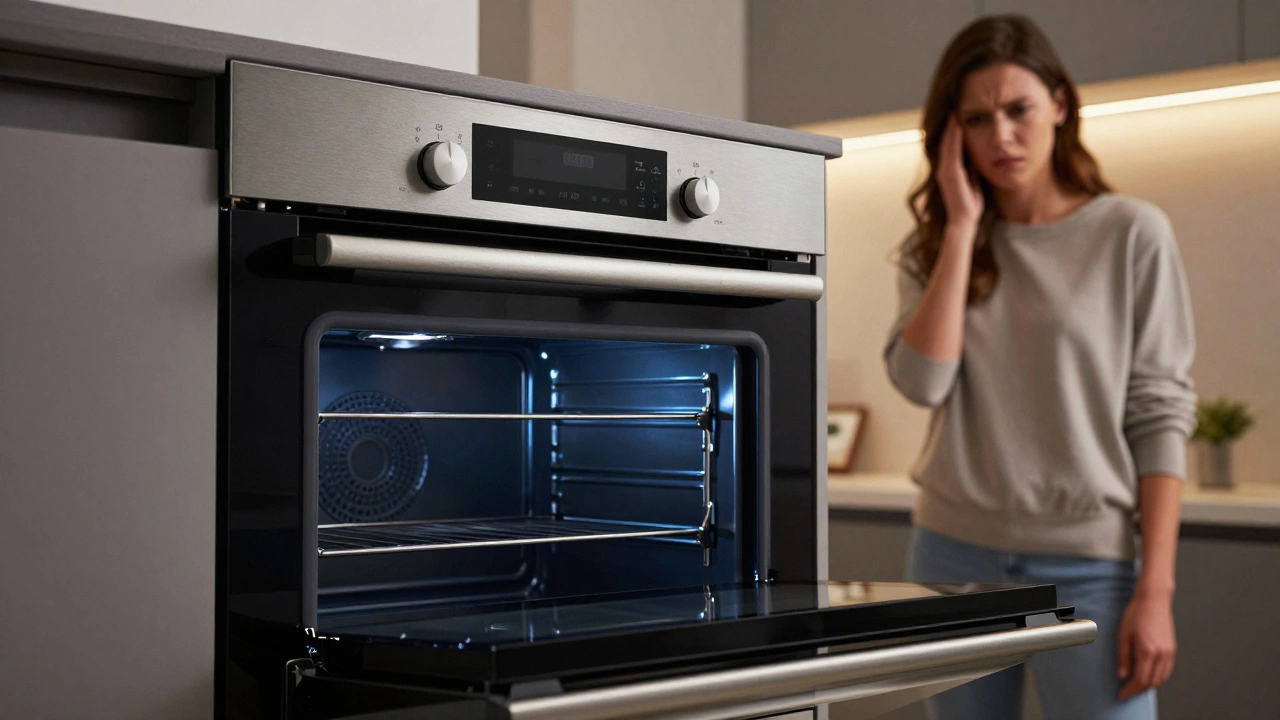
Your oven door opens, but the inside stays cold. You press 'Start', and nothing happens-or worse, it starts beeping like a fire alarm that won't stop. It’s frustrating, especially when you’re trying to get dinner on the table. Before you call a technician or buy a replacement part online, you need to know if the culprit is actually the control board. Swapping out an expensive circuit board for no reason is a waste of money. But ignoring a failing board can leave your kitchen in limbo.
The control board is the brain of your electric oven. It takes the signal from the keypad, talks to the temperature sensors, and tells the heating elements when to turn on. When this communication breaks down, the oven stops working correctly. In this guide, we’ll walk through exactly how to spot a bad control board, what other parts might be mimicking its failure, and how to decide if you should fix it yourself or hire a pro.
The Quick Signs of a Failing Control Board
You don’t need a multimeter to suspect a bad board right away. There are distinct behavioral patterns that point directly to the electronics rather than the mechanical parts. If your oven exhibits any of these issues, the control board is the prime suspect.
- No Power at All: The display is blank, buttons don’t light up, and the oven won’t heat. This could be a tripped breaker, but if power is reaching the unit (check by plugging in a lamp into the same outlet), the board isn’t receiving or distributing voltage.
- Ghost Commands: The oven turns itself on, changes temperature settings without input, or beeps randomly. This indicates shorted capacitors or faulty logic chips on the board sending erratic signals.
- Unresponsive Keypad: You press a button, but the screen doesn’t register it. While this can be a membrane switch issue, often the board fails to process the input signal.
- Temperature Drift: The oven reads 350°F, but your oven thermometer says it’s actually at 400°F or 250°F. If calibration doesn’t fix it, the board isn’t interpreting the sensor data correctly.
- Error Codes: Modern ovens flash specific codes (like F9, E6, or H1). These are digital diagnostics telling you exactly which component failed. A code pointing to the main control usually means the board is dead.
If you see physical damage-burn marks, melted plastic, or a smell of ozone coming from the back panel where the board sits-the job is done. That board is toast. Replace it immediately to prevent fire hazards.
Don't Blame the Brain Too Soon: Common Misdiagnoses
Here is the tricky part. A bad control board looks a lot like a bad thermostat, a broken heating element, or a loose wire. Many homeowners replace the board only to find the problem persists. Why? Because they skipped the simpler checks.
Before condemning the control board, rule out these three common culprits:
- The Thermal Fuse: Most ovens have a safety fuse that blows if the oven gets too hot. If this fuse is open, no power reaches the control board. The board looks dead, but it’s just unplugged by safety design. Check continuity on the fuse first.
- The Heating Elements: If the oven won’t heat, check the bake and broil elements. Do they glow red? If one is broken, the oven won’t reach temperature, making it seem like the board isn’t commanding it to heat. Visually inspect for blisters or cracks.
- The Temperature Sensor: This is a small probe in the back of the oven cavity. If it’s disconnected or has infinite resistance, the control board panics and shuts down heating to prevent overheating. Use a multimeter to check if the sensor reads between 100-1100 ohms as it heats up.
If the fuse is good, the elements look fine, and the sensor is reading correctly, then yes-you likely have a bad control board.
| Symptom | Likely Cause | Control Board Suspect? |
|---|---|---|
| Oven completely dead (no lights) | Thermal fuse, breaker, or power cord | Low (Check fuse first) |
| Display works, but no heat | Heating elements or relays on board | Medium (Check elements first) |
| Random beeping/turning on | Shorted control board or stuck key | High |
| Temperature inaccurate | Temperature sensor or calibration | Low (Calibrate first) |
| Error Code F9/E6/H1 | Main control board failure | Very High |
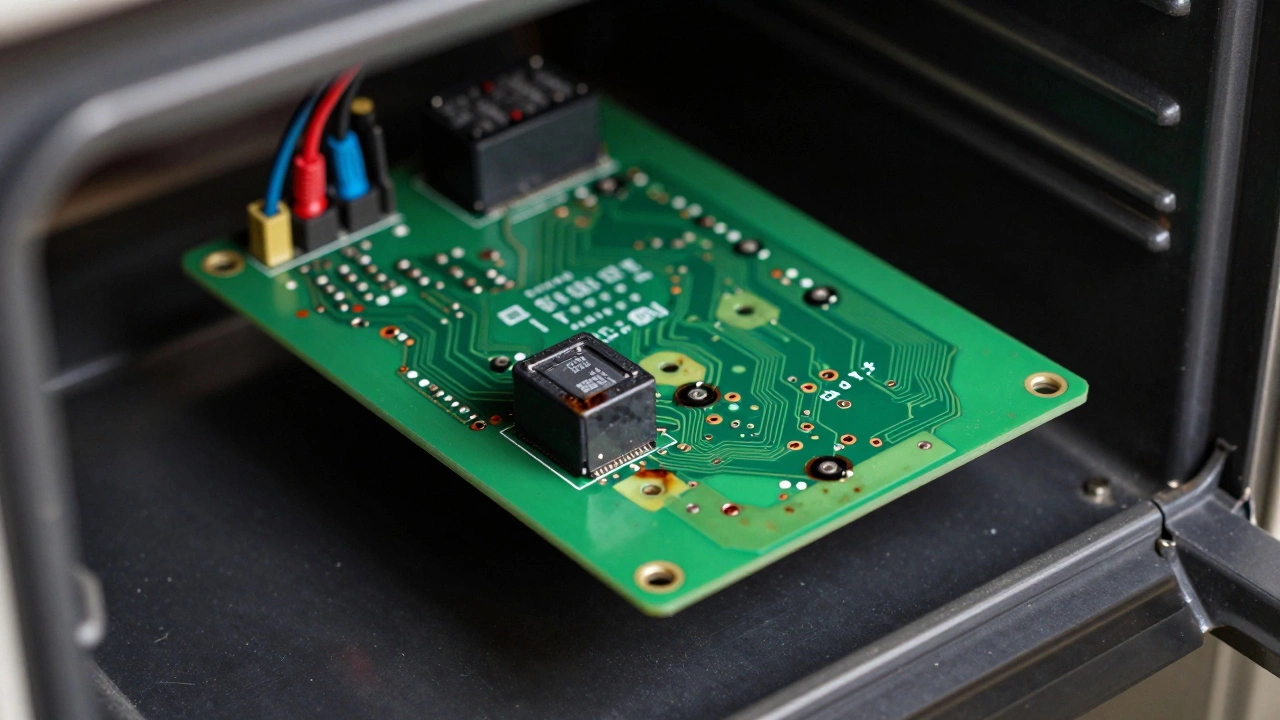
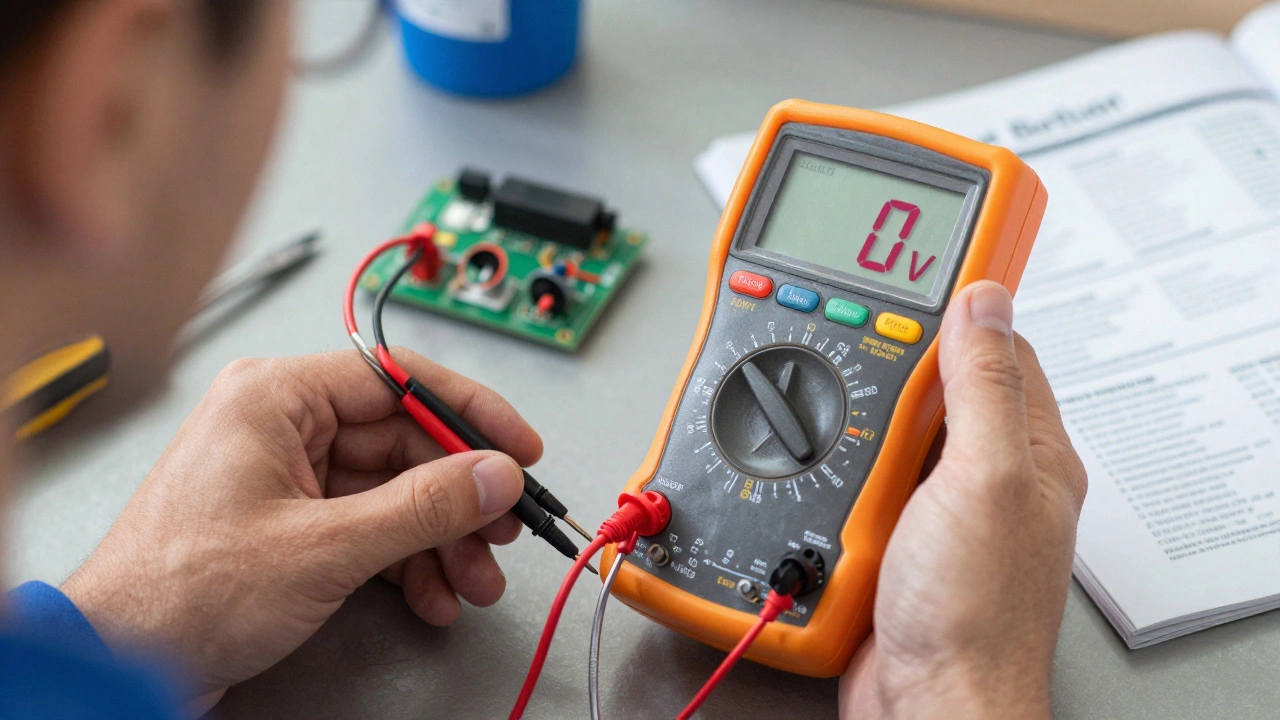
How to Test the Control Board with a Multimeter
If you want definitive proof, you need to test the board electrically. This requires a multimeter set to AC Volts. Warning: Always unplug the oven or turn off the circuit breaker before removing panels. Live voltage inside an oven can cause severe shock or arc flash.
Once the back panel is removed, locate the control board. It’s usually a green or blue circuit board with several wire harnesses plugged into it. Here is how to verify if it’s sending power to the heating elements:
- Set the Oven: Plug the oven back in temporarily (keep the back panel off for testing only) and set the oven to Bake at 350°F.
- Locate the Relay Terminals: Find the wires that go to the bake element. On the control board, these connect to a relay (a small black box on the board).
- Measure Voltage: With the multimeter probes touching the two terminals where the bake element wires connect to the board, check for voltage.
- If the oven is calling for heat, you should read 240V (in North America) or 230-240V (in Europe/NZ/Australia).
- If you read 0V, the board is not sending power. The board is bad.
- If you read full voltage, the board is working. The problem lies downstream (bad element, broken wire, or bad connection).
- Check Input Power: Also check the incoming power lines to the board. If there’s no input voltage, the board can’t work. This points to a wiring issue or blown fuse upstream.
This test isolates the board from the rest of the system. If the board receives power but doesn’t output it to the elements when commanded, the internal relays or logic chips have failed.
Replacing the Control Board: DIY vs. Pro
Replacing an oven control board is considered a medium-difficulty repair. It involves removing the back panel, disconnecting wire harnesses, and mounting the new board. It does not require soldering, but it does require careful attention to detail.
When to DIY: If you are comfortable using screwdrivers, taking photos of wire connections before unplugging them, and following a service manual, you can save $150-$300 in labor costs. The part itself usually costs between $80 and $250 depending on the brand (GE, Whirlpool, Samsung, etc.).
When to Call a Pro: If your oven is under warranty, opening the back panel may void it. Also, if you are unsure about identifying live wires or handling high-voltage components, hire a certified appliance technician. They have diagnostic tools that can pinpoint failures faster and ensure the installation meets local electrical codes.
Preventing Future Control Board Failures
Control boards don’t usually fail for no reason. They are sensitive to moisture, heat spikes, and power surges. Here is how to extend the life of your oven’s brain:
- Use a Surge Protector: If your area experiences frequent lightning storms or grid fluctuations, plug your oven into a heavy-duty surge protector rated for high-wattage appliances. Voltage spikes fry control boards instantly.
- Keep It Dry: Don’t steam clean the back of the oven. Moisture ingress causes corrosion on the circuit traces. Ensure the oven is installed in a well-ventilated area.
- Regular Calibration: Keep your oven temperature accurate. An oven that runs too hot stresses the thermal fuses and forces the control board to cycle more frequently, wearing out the relays.
- Inspect Door Seals: A broken door gasket lets heat escape. The oven works harder to maintain temperature, causing excessive cycling that can overheat the control compartment.
Knowing how to diagnose a bad control board saves you from unnecessary repairs and ensures your oven performs safely. By checking the simple things first-fuses, elements, and sensors-you avoid buying a new board prematurely. But when the signs are clear-random behavior, error codes, or zero output voltage-it’s time to replace the brain of your oven.
How much does it cost to replace an oven control board?
The cost varies by brand and model. Generic or aftermarket boards range from $50 to $100. Original Equipment Manufacturer (OEM) parts typically cost between $100 and $300. Labor costs for a professional installation add another $100 to $200, depending on your location and the technician's hourly rate.
Can I reset my oven control board?
Yes, sometimes a simple power cycle resets temporary glitches. Unplug the oven or turn off the circuit breaker for 5 to 10 minutes. This drains residual power from the capacitors on the board. Plug it back in and test. If the error persists, the hardware is likely damaged.
What causes an oven control board to fail?
Common causes include power surges, moisture exposure, overheating due to poor ventilation, and worn-out relays from years of switching high-current heating elements on and off. Manufacturing defects can also cause early failure, especially within the first few years.
Is it safe to use an oven with a faulty control board?
No. A faulty control board can send incorrect voltage to heating elements, leading to overheating, fire hazards, or electrical shocks. If you suspect the board is bad, stop using the oven immediately until it is repaired or replaced.
How do I find the correct replacement control board?
Look for the model number plate inside the oven door frame or on the side wall. Search for this exact model number along with "control board" or "main PCB" on appliance parts websites. Cross-reference the part number on the old board with the new one to ensure compatibility.
I am an expert in the services industry with a focus on appliance repair. My passion lies in understanding how things work and educating others in simple, engaging ways. This enthusiasm fuels my writing, where I delve into topics around appliance maintenance and troubleshooting. I aim to make these subjects clear and accessible to all readers.