Extractor Fan Installation Planner
Step 1: Safety & Legal Assessment
Before buying anything, ensure it is safe and legal for you to proceed.
Step 2: Tool Readiness
Do you have the essential tools required for a clean and safe installation?
Step 3: Fit & Airflow Verification
Ensure the new fan fits physically and meets ventilation codes.
Step 4: Your Installation Plan
Review your readiness summary before starting work.
That high-pitched whine from your kitchen or bathroom vent isn't just annoying; it’s a sign that your extractor fan is failing. You might be tempted to grab a screwdriver and swap it out yourself to save money. It’s a common thought, especially when quotes for professional help come back higher than expected. But before you climb onto a ladder, there’s a crucial question: do you actually have the skills, tools, and local knowledge to do this safely?
The short answer is yes, you can replace an extractor fan yourself. However, it’s not as simple as swapping a lightbulb. This task sits at the intersection of basic carpentry, ductwork management, and-most importantly-electrical work. In many regions, including New Zealand where I’m based, electrical regulations are strict. If you mess up the wiring, you risk fire hazards or voiding your home insurance.
Quick Summary / Key Takeaways
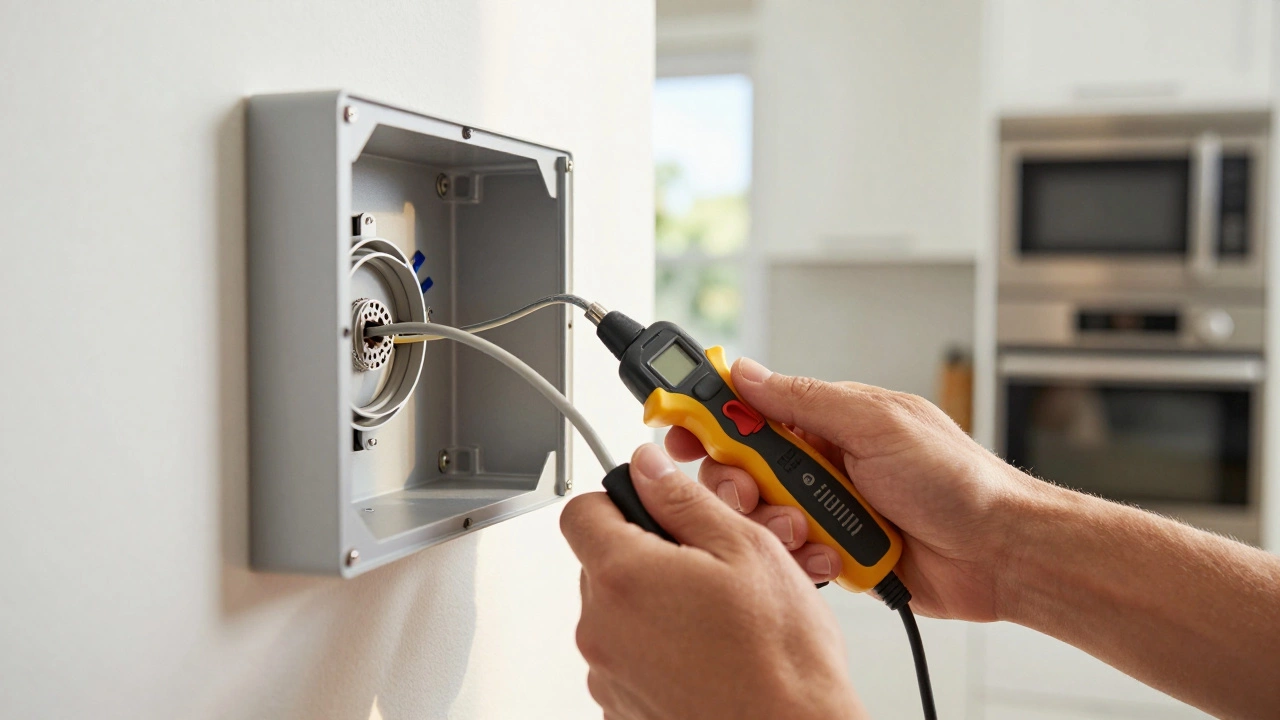
- Safety First: Always turn off the power at the main circuit breaker before touching any wires. Test with a voltage tester to confirm it’s dead.
- Check Compatibility: Ensure the new fan fits the existing cutout dimensions and matches the airflow requirements (measured in liters per second) for your room size.
- Electrical Rules: In many jurisdictions, hardwiring a fan requires a licensed electrician. Plug-in models offer a safer DIY alternative.
- Sealing Matters: Properly seal gaps around the unit to prevent drafts, pests, and moisture leaks, which can cause mold growth.
- Know When to Stop: If you encounter damaged walls, complex ductwork changes, or unfamiliar wiring colors, call a professional.
Assessing Your Skill Level and Local Regulations
Before buying a new unit, look honestly at your own experience. Have you replaced a ceiling rose? Installed a power point? If those sound intimidating, replacing an extractor fan will likely be too. The physical installation involves cutting into plasterboard or tile grout, which is messy and irreversible if done wrong. The electrical connection involves joining live wires, which carries genuine risk.
In New Zealand, under the Electrical Wiring Regulations, any fixed wiring work must be certified by a Licensed Electrician. This means if your current fan is hardwired directly into the house’s electrical system, you technically cannot legally replace it yourself unless you hold that license. However, many modern fans come with a standard plug. If your old fan is plugged into a nearby socket (often hidden behind the fan housing), you can simply unplug it and plug in the new one. This is the safest route for DIYers. Check your local laws; in the UK, minor works like replacing a like-for-like appliance might be permitted for homeowners, but rules vary wildly.
Gathering the Right Tools and Materials
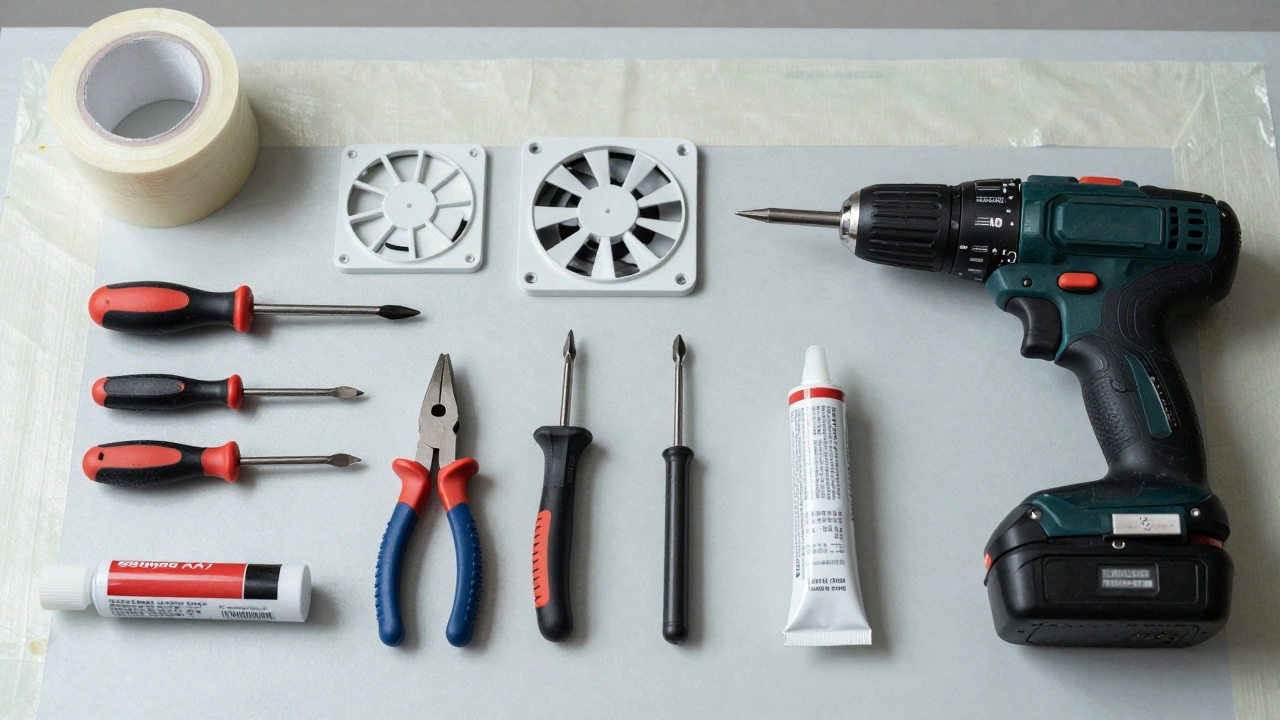
You can’t wing this job with a multi-tool and hope for the best. Having the right equipment makes the difference between a clean install and a disaster. Here’s what you’ll need:
- Voltage Tester: Non-negotiable. Use this to ensure no power is reaching the wires.
- Screwdrivers: Both flathead and Phillips head, preferably insulated handles.
- Pliers: For gripping wires and removing mounting clips.
- Drill and Bits: Masonry bits if you’re drilling into brick or concrete for wall-mounted units.
- Silicone Sealant: To waterproof the gap between the fan and the wall/ceiling.
- Masking Tape and Drop Cloths: To protect your surfaces from dust and debris during removal.
- Ladder: A sturdy step ladder if working on a ceiling or high wall.
If you’re replacing a ceiling-mounted fan, you might also need a drywall saw to trim the opening if the new model has slightly different dimensions. Measure the existing hole carefully before purchasing the replacement.
Step-by-Step Installation Process
Once you’ve confirmed it’s legal and safe for you to proceed, follow these steps. We’ll assume a standard wall-mounted kitchen fan for this example, as they are the most common DIY candidates.
- Cut the Power: Go to your consumer unit (fuse box) and switch off the circuit breaker that supplies power to the fan. Don’t just rely on the wall switch. Turn it off, then use your voltage tester on the wires inside the fan housing to double-check. If the tester lights up, stop immediately and call an electrician.
- Remove the Old Fan: Unscrew the front grille. You’ll see the motor housing attached to the outer casing. Disconnect the wires. Note how they were connected-take a photo with your phone first. This helps if you get confused later. Pull the old unit out of the wall cavity. Be careful; it might be heavy or stuck with old sealant.
- Inspect the Cavity: Look inside the hole. Is there insulation blocking the duct? Are there nests or debris? Clear everything out. Check the condition of the duct pipe itself. If it’s crushed or disconnected, fixing that might require more extensive work than just swapping the fan.
- Prepare the New Unit: Compare the new fan’s dimensions with the hole. If it’s smaller, you may need a mounting plate or filler strips. If it’s larger, you’ll need to carefully widen the hole. Connect the wires to the new fan according to its manual. Typically, Live (brown/red) goes to Live, Neutral (blue/black) to Neutral, and Earth (green/yellow) to Earth. Use wire connectors (Wago levers or twist caps) securely.
- Mount the Fan: Slide the new unit into place. Secure it with the provided screws. Ensure it sits flush against the wall or ceiling. Apply a bead of silicone sealant around the edges to prevent air leaks and moisture ingress. Let it cure as per the manufacturer’s instructions.
- Reconnect and Test: Reattach the grille. Turn the power back on at the breaker. Switch on the fan. Listen for unusual noises. Check for vibration. If it runs smoothly and pulls air effectively, you’re done.

Common Pitfalls to Avoid
Even experienced DIYers make mistakes here. One common error is ignoring the airflow rating. Bathrooms and kitchens have specific ventilation requirements. In New Zealand, the Building Code H1 mandates minimum extraction rates. A small, quiet fan might look nice but fail to remove enough steam, leading to mold. Check the label for "Liters per Second" (L/s). For a typical bathroom, you need at least 15 L/s, while a kitchen often requires 50 L/s or more depending on the hob type.
Another pitfall is poor sealing. If you don’t seal the gap between the fan and the wall, cold air can leak in, increasing heating bills. Worse, insects and spiders can enter through these gaps. Take your time with the silicone. It’s not pretty, but it’s essential for long-term performance.
Also, watch out for ductwork restrictions. Some homes have long, winding ducts with sharp bends. These reduce airflow significantly. If your new fan is powerful but the duct is restrictive, you’ll hear loud turbulence but get little actual ventilation. Consider installing a straighter, shorter duct run if possible.
| Factor | DIY Installation | Professional Electrician |
|---|---|---|
| Cost | Low (only parts) | High (labor + parts) |
| Time | 2-4 hours | 1-2 hours |
| Safety Risk | High if inexperienced | Minimal |
| Legal Compliance | Varies by region (check laws) | Fully compliant |
| Warranty | May void if installed incorrectly | Usually included |
When to Call a Professional
There are clear signs that this job is beyond your scope. If the wiring looks old, brittle, or non-standard (e.g., cloth-insulated wires), stop. If you need to extend the electrical circuit because the nearest socket is far away, call an electrician. If the fan is integrated into a range hood with complex gas connections, leave it to experts. Finally, if you feel unsure at any point, your instinct is right. Hiring a pro costs money, but a house fire costs far more.
Is it legal to replace an extractor fan myself in New Zealand?
If the fan is hardwired into the electrical system, no. Under NZ Electrical Wiring Regulations, fixed wiring must be done by a Licensed Electrician. However, if the fan is plug-in type and you are only swapping the unit without altering the wiring, it is generally permissible for homeowners.
How do I know if my new fan fits the old hole?
Measure the width and height of the existing cutout in millimeters. Compare this with the "cutout dimensions" listed in the new fan’s manual. Most manufacturers provide a template. If the new fan is slightly smaller, you can use filler strips. If it’s larger, you’ll need to carefully enlarge the hole, which risks damaging surrounding tiles or plaster.
What should I do if the fan doesn’t have a plug?
If the fan is hardwired and you are not a licensed electrician, you should hire one. Attempting to connect live wires yourself is dangerous and likely illegal. Alternatively, consider installing a surface-mounted fan that plugs into an existing nearby outlet, avoiding hardwiring altogether.
Why is my new fan noisy after installation?
Noise often comes from vibration or poor ductwork. Ensure the fan is mounted tightly and evenly. Check that the duct pipe is not kinked or blocked. Loose mounting screws can also cause rattling. Tighten all connections and add rubber gaskets if available to dampen vibration.
Do I need a permit to replace an extractor fan?
In most cases, no building consent is needed for like-for-like replacements. However, if you are changing the location of the fan, extending ductwork through external walls, or making significant structural alterations, you may need approval from your local council. Always check local regulations.
I am an expert in the services industry with a focus on appliance repair. My passion lies in understanding how things work and educating others in simple, engaging ways. This enthusiasm fuels my writing, where I delve into topics around appliance maintenance and troubleshooting. I aim to make these subjects clear and accessible to all readers.