Fridge DIY Troubleshooter
Select the symptom your fridge is exhibiting to see the likely cause, DIY feasibility, and estimated costs.
General Safety Reminder
Always unplug the fridge before inspecting electrical components. If you suspect a refrigerant leak (oily residue on pipes), do not attempt DIY repair; call a certified technician.
You’re standing in the kitchen, staring at a fridge that’s suddenly stopped cooling. The milk is warm, the ice cream is melting, and your first instinct might be to call a technician for an expensive service call-out fee. But before you pick up the phone, ask yourself: can you fix a fridge by yourself? For many common issues, the answer is yes. With a screwdriver, a multimeter, and about an hour of patience, you can often diagnose and repair the problem without leaving your house.
This isn’t just about saving money, although that’s a huge perk. It’s about understanding how your appliances work so you aren’t left helpless when things break down. Most refrigerators are surprisingly simple machines based on basic thermodynamics. They move heat from inside the box to outside using a circulating fluid called refrigerant. When they fail, it’s usually because one specific component has worn out or gotten dirty. Let’s walk through exactly what you can handle and when you need to throw in the towel.
The Safety First Rule
Before you grab any tools, let’s talk safety. Refrigerators run on high voltage electricity, and the systems involve pressurized gases. If you mess with the sealed refrigeration system (the pipes containing the gas), you’re entering territory that requires specialized equipment and certification. In New Zealand, working on the sealed system generally requires a licensed gas fitter or registered electrician depending on local council regulations. However, fixing electrical components like fans, thermostats, or door switches is perfectly safe for a competent DIYer.
Always unplug the fridge before doing anything. Don’t just switch it off; pull the plug from the wall socket. This eliminates the risk of electric shock while you’re poking around behind panels. Also, wear gloves if you’re cleaning coils or handling sharp metal fins. Those condenser coils can cut skin easily if you’re not careful.
Diagnosing the Problem Like a Pro
Most fridge failures fall into three buckets: no power, poor cooling, or excessive noise. Identifying which bucket your problem falls into saves you from buying random replacement parts. Here is how to troubleshoot each scenario efficiently.
If the light doesn’t turn on and the compressor is silent, check the obvious stuff first. Is the plug loose? Is the circuit breaker tripped? Test the outlet with another device, like a lamp, to ensure it’s actually receiving power. If the outlet works but the fridge is dead, the issue might be the door switch. Yes, really. Many fridges only activate the compressor when the door switch detects the door is closed. If that switch breaks, the fridge thinks the door is open and shuts down the cooling cycle to save energy. You can test this by manually pressing the switch plunger with your finger while listening for the compressor to hum.
If the fridge runs but doesn’t cool, check the temperature settings first. Sometimes kids or guests bump the dial. Next, listen closely. Do you hear the compressor running continuously? Or does it click and stop after a few seconds? Continuous running suggests the fridge is trying hard but failing to remove heat, often due to dirty coils or a failed fan. Clicking suggests a start relay or capacitor failure. These are cheap parts you can replace yourself.
Cleaning Condenser Coils: The Easiest Fix
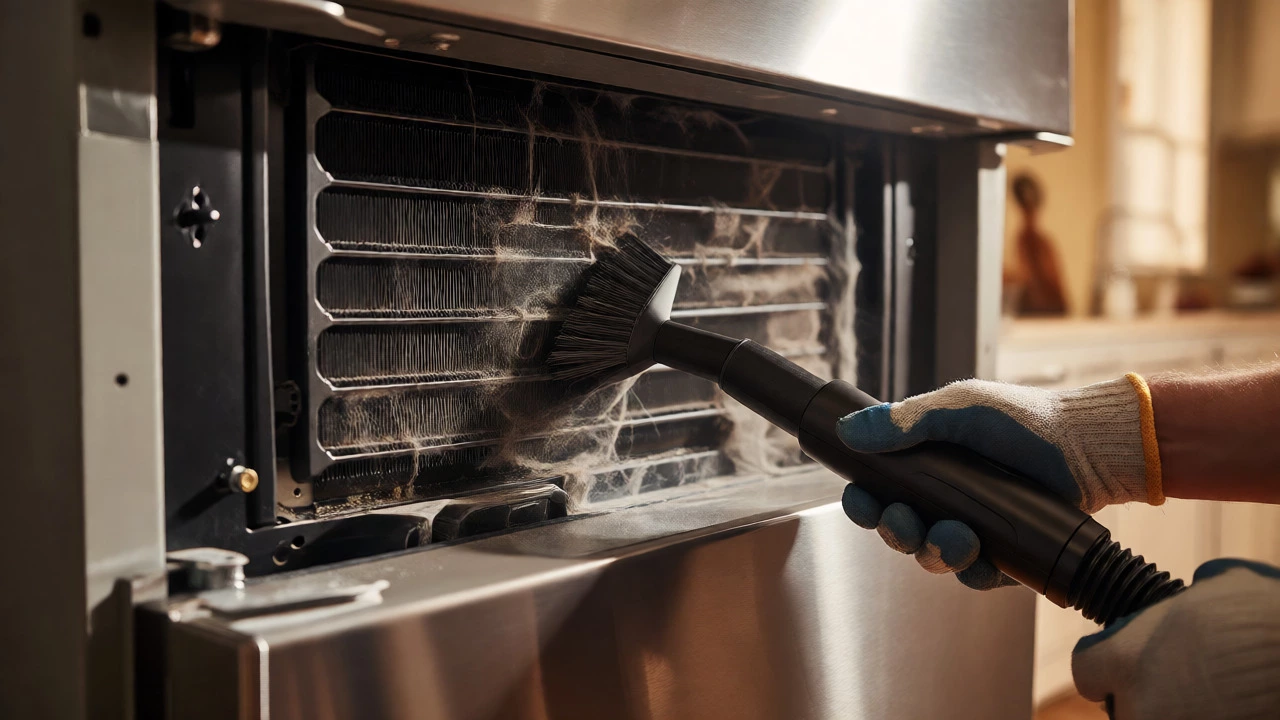
Let’s start with the most common cause of poor cooling: dirty condenser coils. These coils release heat from the refrigerant into the room air. Over time, dust, pet hair, and lint coat them like a woolly jumper. This insulation prevents heat from escaping, forcing the compressor to work harder and less effectively. In Wellington’s damp climate, mold and mildew can also build up here, adding to the grime.
To clean them, locate the coils. On older models, they’re black grids on the back. On newer ones, they’re often under a kick plate at the bottom front. Unplug the fridge, slide it out carefully, and use a vacuum cleaner with a brush attachment to suck away the debris. For stubborn dirt, use a coil cleaning brush available at hardware stores for around $15. Do not use water unless you have a specialized spray kit, as moisture can damage electrical components nearby. Once cleaned, push the fridge back, ensuring there’s at least 5cm of clearance from the wall for airflow. You’ll likely see immediate improvement in cooling performance.
Replacing Faulty Fans
Refrigerators have two main fans: the evaporator fan (inside the freezer compartment) and the condenser fan (at the back or bottom). Both are critical. The evaporator fan blows cold air over the coils and into the fridge/freezer compartments. If it stops, frost builds up on the coils, and air circulation dies. You’ll notice the freezer gets too cold, but the fridge section stays warm.
To replace the evaporator fan, you’ll need to empty the freezer, remove the shelving, and unscrew the rear panel inside the freezer compartment. Locate the fan motor attached to the blower wheel. Check if the blade spins freely. If it’s stuck or makes grinding noises, the bearings are shot. Disconnect the wiring harness, unscrew the mounting bolts, and swap in a new motor. Part costs typically range from $40 to $80 NZD. Ensure you match the model number exactly, as voltages and sizes vary.
The condenser fan cools the compressor and coils. If it fails, the compressor overheats and shuts down on its thermal overload protector. You’ll hear the compressor try to start, click, and then go silent. Accessing this fan is usually easier-often just removing a cover at the back or bottom. Again, check for obstruction first. Sometimes a piece of cardboard or packaging material blocks the blades. If the motor itself is seized, replace it just like the evaporator fan.
Tackling Start Relays and Capacitors
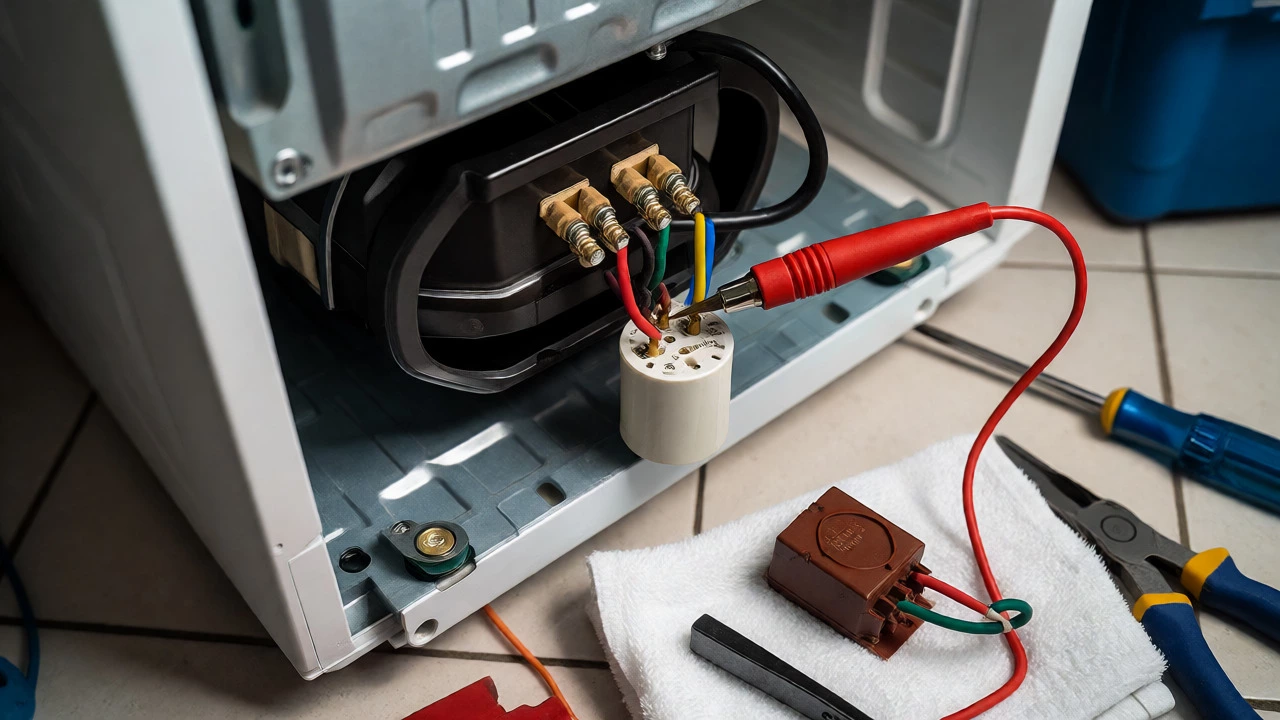
If your compressor buzzes but doesn’t start, or starts and immediately clicks off, suspect the start relay or run capacitor. These small electrical components help the compressor motor get going. They are inexpensive ($10-$30 NZD) and easy to access at the back of the unit near the compressor.
The start relay plugs directly onto the side of the compressor. Unplug the fridge, remove the plastic cover, and pull the relay off. Shake it. If it rattles, the internal spring mechanism is broken-it needs replacing. For the capacitor, you’ll need a multimeter to test capacitance. Set the meter to microfarads (µF). Touch the probes to the terminals. If the reading is significantly lower than the value printed on the capacitor body (e.g., reading 20µF when it says 35µF), it’s weak and must be replaced. Always discharge a capacitor with an insulated screwdriver before touching it, as it can hold a charge even when unplugged.

When to Call a Professional
So, where do you draw the line? There are specific scenarios where DIY becomes risky or impossible without professional tools.
| Symptom | Likely Cause | DIY Feasibility | Estimated Cost (NZD) |
|---|---|---|---|
| Fridge warm, coils dusty | Dirty condenser coils | High | $0 - $20 (Cleaning supplies) |
| Compressor clicks, doesn't run | Start Relay/Capacitor | Medium | $30 - $60 (Parts + Time) |
| Noise from freezer, poor cooling | Evaporator Fan Motor | Medium | $50 - $90 (Part) |
| Water leaking inside fridge | Clogged Defrost Drain | High | $0 (Hot water flush) |
| Refrigerant leak (oily residue) | Sealed System Breach | Low | $300+ (Professional Service) |
| Control board error codes | Electronic Control Board | Low/Medium | $150 - $300 (Part) |
If you find oily residue around the copper pipes, you have a refrigerant leak. Sealing this requires brazing skills and recharging the system with precise amounts of gas. This is strictly a job for a certified technician. Similarly, if the electronic control board displays complex error codes that don’t match simple sensor failures, diagnosing the root cause often requires proprietary diagnostic tools. While you can buy boards online, misdiagnosis leads to wasted money. If the fridge is over 10-12 years old and needs a major part like a compressor, consider whether the repair cost exceeds 50% of a new unit’s price. Sometimes, upgrading to a modern, energy-efficient model is smarter financially.
Preventative Maintenance Tips
Once you’ve fixed your fridge, keep it healthy. Clean the condenser coils every six months. Wipe down the interior seals (gaskets) regularly with warm soapy water to prevent mold buildup and ensure a tight seal. Check the drip pan underneath the fridge once a year; if it’s full of stagnant water, clean it out to avoid bad smells and rust. Finally, don’t overload the fridge. Air needs to circulate around food items to maintain consistent temperatures. Packing it like sardines restricts airflow and forces the compressor to work overtime.
How much does it cost to hire a fridge repairer in New Zealand?
In New Zealand, you can expect to pay between $150 and $250 NZD for a standard service call-out, which usually includes the first hour of labor. Parts are charged extra. Simple fixes like relays might total $200-$300, while compressor replacements can exceed $500. Prices vary by city and company, so always ask for a quote upfront.
Is it worth repairing an old fridge?
If the fridge is under 10 years old and the repair cost is less than 50% of the price of a new equivalent model, it’s usually worth fixing. For fridges older than 12-15 years, frequent breakdowns are common, and efficiency drops significantly. Investing in a new Energy Star rated model often pays for itself in lower electricity bills within a few years.
Why is my fridge making a loud buzzing noise?
A loud buzzing often indicates the compressor is struggling to start, possibly due to a faulty start relay or capacitor. It could also mean the condenser fan motor is obstructed or failing. Check for loose panels vibrating against the cabinet first. If the noise comes from the back near the compressor, inspect the electrical components mentioned earlier.
Can I reset my fridge myself?
Yes. To perform a hard reset, unplug the fridge from the wall outlet for at least 5 minutes. This allows the capacitors to discharge and resets the electronic control board. Plug it back in and wait 24 hours to see if normal operation resumes. This often clears temporary glitches in the electronics.
What tools do I need for basic fridge repair?
You’ll need a Phillips head screwdriver, a flathead screwdriver, needle-nose pliers, and a multimeter for testing electrical continuity and capacitance. A putty knife helps pry off plastic clips without breaking them. For cleaning, a vacuum with a brush attachment and a coil cleaning brush are essential.
I am an expert in the services industry with a focus on appliance repair. My passion lies in understanding how things work and educating others in simple, engaging ways. This enthusiasm fuels my writing, where I delve into topics around appliance maintenance and troubleshooting. I aim to make these subjects clear and accessible to all readers.