Electric Stove Element Diagnostic Tool
Diagnostic Inputs
Look closely at the element surface.
Set meter to Ohms (Ω) and touch probes to terminals.
What happens when you turn it on?
Diagnosis Result
Select your inputs and click "Analyze Problem" to get a diagnosis.
There is nothing worse than putting a meal in the oven, setting the timer, and opening the door ten minutes later to find raw chicken or cold vegetables. You check the dial, you check the plug, and everything looks fine. The culprit is often hidden beneath the metal grates or inside the cavity: a failed electric stove element is the heating component responsible for generating consistent heat in your cooktop or oven.. Whether it is the flat coil on your stovetop or the tube at the bottom of your oven, these parts wear out. Knowing how to spot a broken one can save you from calling a technician for a simple swap.
The Quick Visual Inspection
Before you grab any tools or multimeters, start with your eyes. Most failures leave physical clues that are impossible to miss once you know what to look for. Pull out the oven racks and turn off the power at the circuit breaker just to be safe while you inspect.
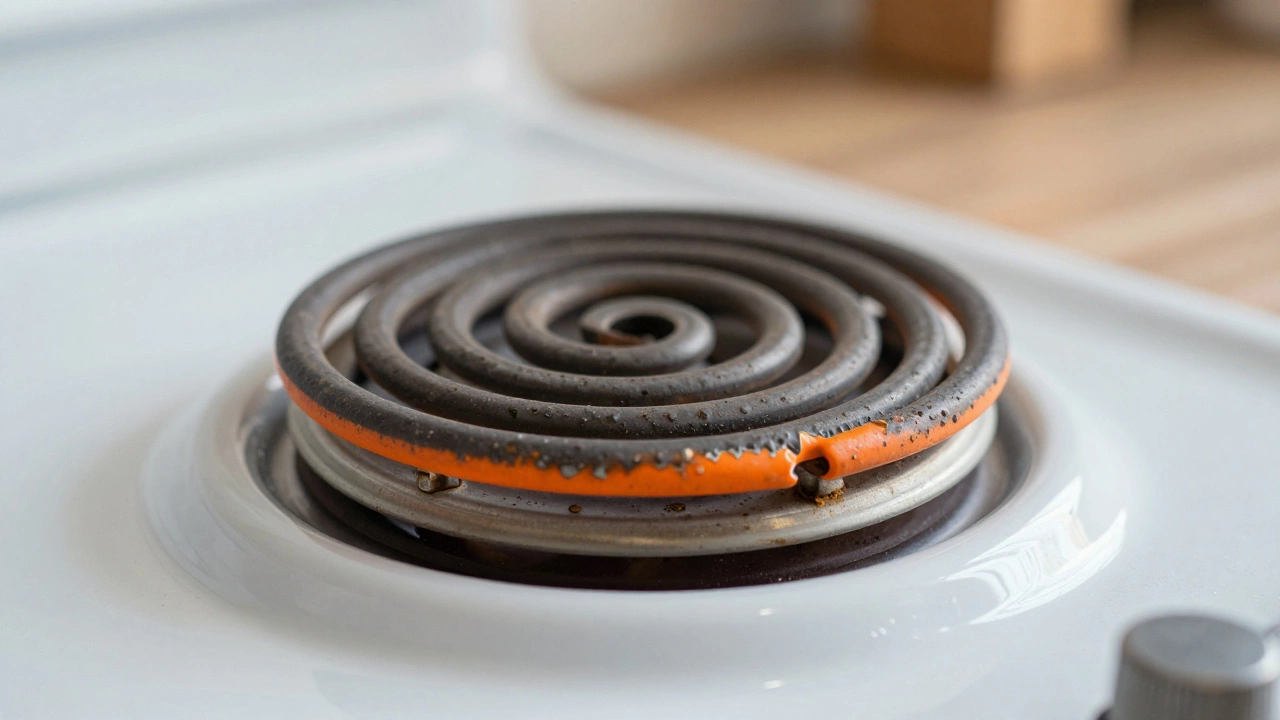
- Blisters or Burns: Look closely at the surface of the element. If you see raised bumps, discoloration, or areas where the enamel coating has peeled away, the element is compromised. These blisters indicate overheating due to internal resistance changes.
- Cracks or Breaks: A visible crack in the metal sheath means the internal heating wire is exposed. This is not just a performance issue; it is a fire hazard. If you see a break, stop using the appliance immediately.
- Glows Unevenly: Turn the burner on low. Watch it closely. Does one end glow bright orange while the other stays dark? Or does it flicker on and off randomly? An element should heat up uniformly across its entire length. Uneven glowing suggests an internal short circuit.
If you spot any of these signs, the diagnosis is straightforward: the element needs replacing. No further testing is required because the physical damage confirms failure.
When It Looks Fine But Doesn't Heat
Sometimes the element looks pristine. No cracks, no blisters, no weird colors. Yet, your soup isn't boiling, or your roast isn't browning. This is where intuition fails, and physics takes over. The problem might not be the element itself but the electricity reaching it.
In many homes, especially older ones in Wellington with vintage wiring, voltage drops can mimic a bad element. However, more often than not, the element has simply reached the end of its lifespan without showing external scars. To confirm this, you need to measure its electrical resistance.
Testing Resistance with a Multimeter
This is the definitive test. You will need a digital multimeter, which costs around $30-$50 at most hardware stores. If you don't have one, borrowing a friend's is worth it. Here is how to do it safely and correctly.
- Disconnect Power: Flip the switch for the stove at your main fuse box. Do not rely on the stove's knobs. Electricity can still flow through the control board even when the knob is off.
- Access the Terminals: For a stovetop coil, lift the grate and pull the element straight up. You will see two prongs underneath. For an oven element, you may need to remove the bottom panel or unscrew the back plate to access the wires connected to the terminals.
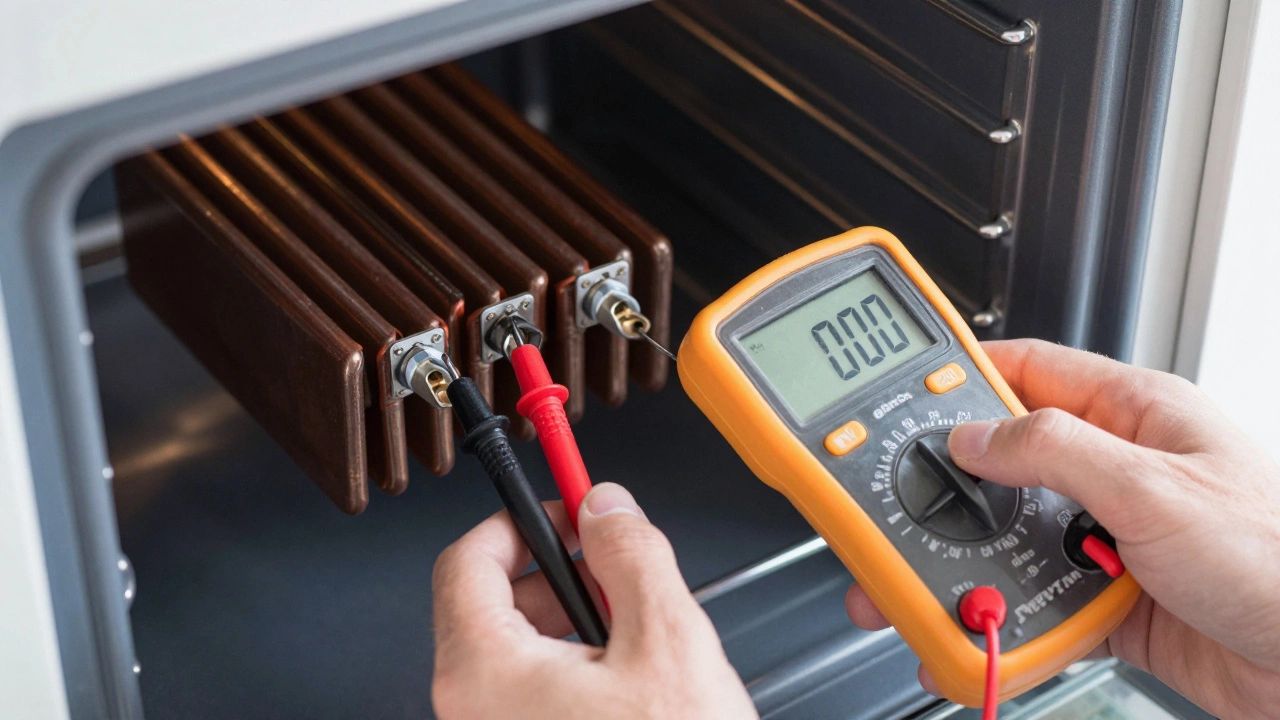
- Set the Multimeter: Turn your multimeter dial to the Ohms (Ω) setting. Start with the lowest range, usually 200Ω.
- Touch the Probes: Place one probe on each terminal prong. Ensure good contact. Avoid touching both probes to the same metal part, as this gives a false reading.
Now, read the display. A healthy electric stove element typically reads between 10 and 30 ohms, depending on its wattage and size. A standard 1500-watt element will read closer to 10-12 ohms, while a smaller simmer burner might read 20-30 ohms.
If the meter reads OL (Over Limit) or ∞ (Infinity), the circuit is open. The internal wire has snapped. The element is dead.
If the meter reads 0 ohms or very close to it, the element has shorted internally. This is dangerous and will trip your breaker frequently. Replace it immediately.
| Reading | Meaning | Action Required |
|---|---|---|
| 10-30 Ω | Normal Resistance | Element is likely fine; check power supply or controls. |
| OL / Infinity | Open Circuit | Internal wire broken. Replace element. |
| 0 Ω | Short Circuit | Internal fault. Replace element immediately. |
Is It the Element or the Control Board?
A common mistake homeowners make is replacing the element when the real problem lies elsewhere. If your multimeter shows a normal resistance (e.g., 15 ohms) but the element still doesn't heat, the issue is upstream. Electricity is not reaching the element.
Check these components next:
- The Thermal Fuse: Located near the oven cavity, this safety device blows if the oven gets too hot. Use your multimeter to check for continuity. If there is no continuity, the fuse is blown and needs replacement. Note: If the fuse blew, investigate why. Was the vent blocked? Did the door seal fail?
- The Timer or Clock: In many models, the clock must be set for the oven to function. If the display is blank, the oven won't heat. Reset the clock and try again.
- The Relay or Control Board: If the element tests good, the fuse is good, and the clock is set, the electronic control board may have a faulty relay. This requires professional diagnosis unless you are comfortable soldering circuits.
Replacing the Element Yourself
If you have confirmed the element is bad, good news: you can fix it yourself. Replacing a standard coil or bake element is a DIY job that takes about 30 minutes. You do not need special skills, just caution.
Step-by-Step Replacement:
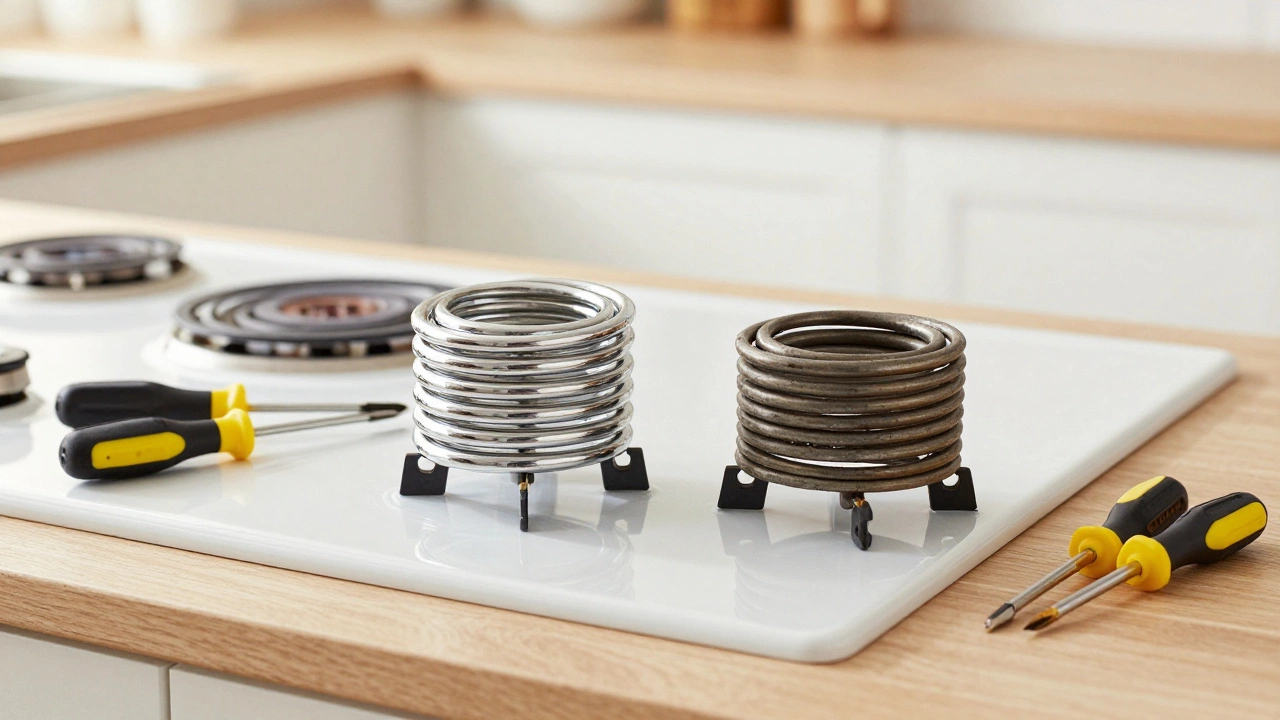
- Buy the Right Part: Take the old element to a parts store or photograph the model number tag inside your oven door frame. Match the wattage and voltage exactly. Using a higher-wattage element can damage your wiring.
- Remove Old Wires: Before unplugging the wires from the old element, take a photo of how they are connected. Note which wire goes to which terminal. Disconnect them carefully.
- Unbolt the Element: Remove the screws holding the element in place. For oven elements, this usually means two screws at the back. For stovetop coils, just lift them out.
- Install the New One: Position the new element securely. Reattach the wires exactly as they were. Tighten connections firmly to prevent arcing.
- Restore Power: Flip the breaker back on. Test the element on a low setting first to ensure it heats evenly.
In New Zealand, we follow strict electrical standards. While swapping an element is generally considered safe maintenance, if you feel unsure about disconnecting wires or handling the mains power, hire a licensed electrician. Safety always trumps savings.
Preventing Future Failures
Electric stove elements last an average of 5 to 10 years. You can extend their life with simple habits.
- Clean Spills Immediately: Sugar and acidic foods can corrode the element's surface when heated. Wipe up spills before they burn onto the coil.
- Use Correct Cookware: Ensure pots and pans sit flat on the element. Warped bottoms create hot spots that stress the element unevenly.
- Avoid Overheating Empty Elements: Never turn an element to high without a pot on it. This causes rapid thermal expansion and contraction, leading to cracks.
By keeping your stove clean and treating the elements with care, you avoid the frustration of unexpected breakdowns during dinner prep. Regular visual checks can catch small issues before they become major repairs.
How much does it cost to replace an electric stove element?
The part itself usually costs between $20 and $60 NZD, depending on the brand and type. If you hire a technician, labor costs can add another $80-$150. Doing it yourself saves significant money.
Can I use a gas stove element in an electric stove?
No. Gas and electric stoves use completely different heating mechanisms. Electric elements rely on electrical resistance to generate heat, while gas uses combustion. They are not interchangeable.
Why does my stove element glow red but not get hot?
This indicates a partial short or high resistance in the circuit. The element is drawing current but not converting it efficiently into heat. This is a sign of imminent failure and requires replacement.
Is it safe to touch a stove element after turning it off?
Not immediately. Elements retain heat for several minutes after being turned off. Always assume the element is hot until you have visually confirmed it has cooled down and tested it with the back of your hand from a distance.
What causes an electric stove element to fail prematurely?
Common causes include spilling sugary liquids, using warped cookware that creates hot spots, frequent high-heat usage without loads, and manufacturing defects. Voltage surges in your home's electrical system can also damage elements.
I am an expert in the services industry with a focus on appliance repair. My passion lies in understanding how things work and educating others in simple, engaging ways. This enthusiasm fuels my writing, where I delve into topics around appliance maintenance and troubleshooting. I aim to make these subjects clear and accessible to all readers.