Dryer Repair DIY Decision Tool
Select the primary symptom your dryer is exhibiting to see if it's a safe DIY project or a professional job.
Verdict: Very Easy DIY
This is likely an airflow issue. Check your lint screen for waxy buildup and vacuum out your external vents.
Risk: None
Verdict: Medium to Hard DIY
Could be a blown Thermal Fuse or failed Heating Element. If you have a multimeter, you can test for continuity.
Risk: Low (ONLY if unplugged from 240V power)
Verdict: Medium DIY
Likely a snapped Drive Belt or worn Idler Pulley. This is a mechanical fix and does not involve electronics.
Risk: Low
Verdict: Mixed / Pro Recommended
Check the Door Switch first (easy fix). However, diagnosing the Control Board is usually beyond a DIYer's scope.
Risk: Low
Verdict: CALL A PROFESSIONAL IMMEDIATELY
Gas leaks are catastrophic. Shut off the main valve immediately. Do NOT attempt to disassemble the gas manifold.
Verdict: PRO RECOMMENDED
Burning smells or sparks indicate serious electrical failure. Given the 240V power, this can be lethal.
You're standing in your laundry room, staring at a pile of damp clothes and a dryer that simply refuses to heat up. The first instinct is to call a professional, but then you wonder: is this a five-minute fix or a disaster waiting to happen? The truth is, many dryer issues are just simple maintenance gaps or worn-out parts that anyone with a screwdriver can handle. However, messing with high-voltage electricity or gas lines can be dangerous if you don't know what you're doing. You can definitely save a few hundred dollars by doing it yourself, provided you know where the line between "simple fix" and "call a pro" is drawn.
Quick Wins for Common Dryer Problems
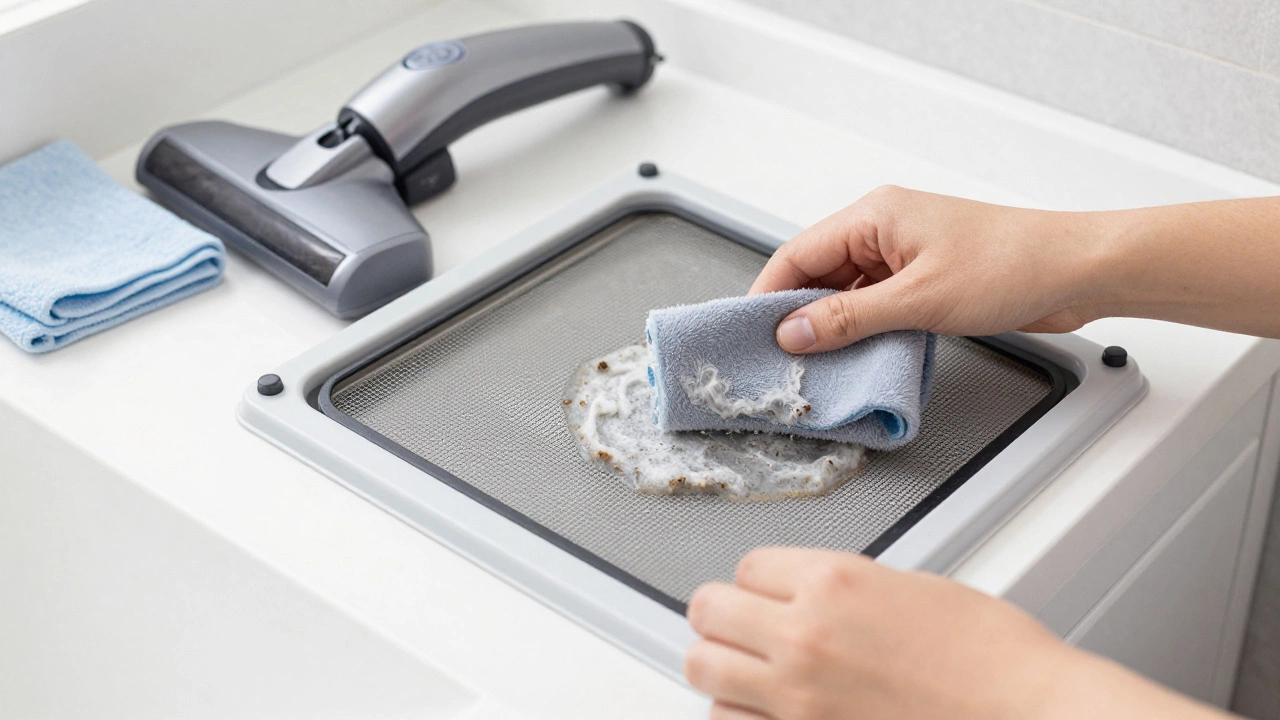
Before you start tearing the machine apart, check the basics. A huge percentage of "broken" dryers are actually just suffering from a lack of airflow. If your clothes take two or three cycles to dry, your dryer repair is likely just a matter of cleaning. Start with the lint screen; if it's coated in a waxy film from dryer sheets, air can't pass through even if it looks clean.
Next, look at the external vent. If the flap outside your house is clogged with lint or blocked by a shrub, the hot air has nowhere to go. This causes the dryer to overheat and often triggers a safety switch that shuts the heat off entirely. Vacuuming out the internal ductwork with a flexible brush kit is a great way to extend the life of your machine and lower your energy bill.
Identifying the Culprit: Heating Issues
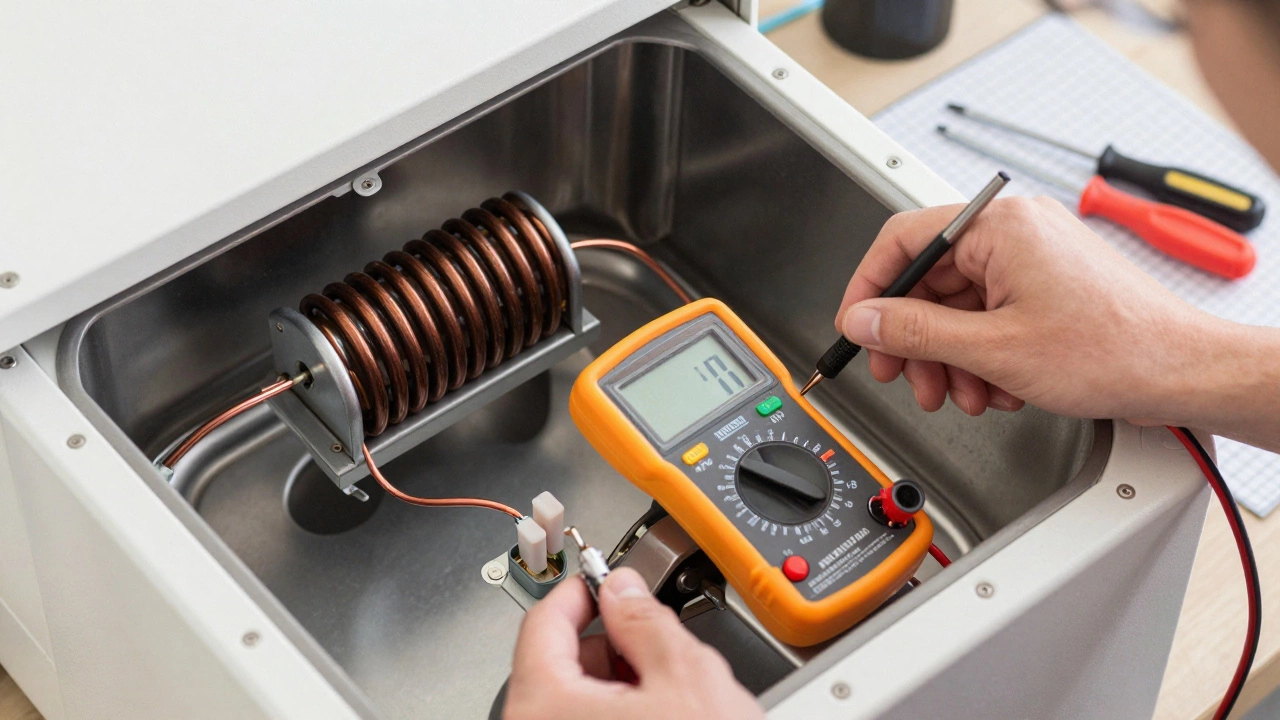
When the dryer spins but the air is cold, you're usually looking at a failed Heating Element or a blown Thermal Fuse. The heating element is the coil that gets hot; over time, these can burn out or break. If you have a multimeter, you can test for continuity. If the circuit is open, the part needs replacing.
The thermal fuse is a safety device. Its only job is to blow if the dryer gets too hot, cutting power to the heater to prevent a house fire. If you find the fuse is blown, don't just replace it and call it a day. A fuse blows for a reason-usually a clogged vent. If you don't fix the airflow, the new fuse will pop the moment you start your first load.
| Task | Difficulty | Tools Needed | Risk Level |
|---|---|---|---|
| Cleaning Vent Ducts | Easy | Vacuum, Vent Brush | Low |
| Replacing Lint Filter | Very Easy | None | None |
| Replacing Thermal Fuse | Medium | Screwdriver, Multimeter | Low (if unplugged) |
| Changing Drive Belt | Medium | Screwdriver, Pliers | Low |
| Replacing Heating Element | Hard | Wrenches, Multimeter | Medium |
When the Drum Won't Spin
If you hear the motor humming but the drum isn't turning, you've probably got a snapped Drive Belt. These are thick rubber bands that connect the motor to the drum. They wear out over time, especially if you consistently overload the machine. Replacing a belt is a bit tedious because you have to take the cabinet apart, but it's a mechanical fix that doesn't involve complex electronics.
Another common culprit for a non-spinning drum is the Idler Pulley. This small wheel keeps tension on the belt. If the pulley wears down or the spring snaps, the belt will slip, and your clothes will just tumble in place. If you see black rubber shavings at the bottom of your dryer cabinet, that's a dead giveaway that the belt or pulley has failed.
Electrical and Control Board Glitches
Modern dryers are basically computers that heat clothes. If your display is flashing error codes or the buttons aren't responding, you're dealing with the Control Board. While you can replace a board yourself, diagnosing exactly which capacitor or relay failed on the circuit is usually beyond a DIYer's scope.
However, check the Door Switch first. The dryer won't start if it doesn't think the door is closed. Sometimes the plastic switch just gets gunked up or bent. A quick spray of electronic cleaner or a gentle bend of the bracket can often bring a "dead" dryer back to life without spending a cent on parts.
The Danger Zone: Gas Dryers and High Voltage
If you have a gas dryer, you're dealing with a Gas Valve and an igniter. This is where the "do it yourself" spirit can become dangerous. A gas leak is a catastrophic risk. If you smell rotten eggs (the scent added to natural gas), shut off the main valve immediately and call a licensed technician. You should never attempt to disassemble the gas manifold or the burner assembly unless you are trained in gas fitting.
For electric dryers, remember that they use a 240-volt circuit. This is double the power of a standard wall outlet and can be lethal. Always, without exception, unplug the machine before removing the back panel. Even then, be cautious around large capacitors, which can hold a charge long after the power is disconnected.
A DIY Maintenance Checklist
To avoid the need for major repairs, treat your dryer like a car-it needs regular tuning. Here is a simple routine to keep your machine running efficiently:
- Every Load: Clean the lint screen. Use a vacuum to get the stray bits out of the screen housing.
- Monthly: Wipe down the inside of the drum with a damp cloth to remove residue from fabric softeners.
- Every Six Months: Disconnect the exhaust hose and vacuum out the entire length of the vent pipe.
- Yearly: Open the bottom panel (unplugged!) and vacuum out the accumulated dust and lint from around the motor and heating element.
Why is my dryer taking so long to dry clothes?
The most common cause is restricted airflow. Check for a clogged lint filter, a blocked external vent, or a crushed exhaust hose. If the air can't escape, the moisture stays in the drum, and the dryer will run for hours without actually drying the clothes.
Can I replace the heating element myself?
Yes, if you are comfortable using a screwdriver and a multimeter. You'll need to unplug the dryer, remove the back or front panel, and swap the old coil for a new one. However, if you aren't confident in your ability to safely handle electrical wiring, it's better to hire a pro.
What does a broken drive belt feel like?
You will usually hear the motor running, but the drum will not rotate. If you try to spin the drum by hand, it will feel completely loose and offer no resistance, as there is nothing connecting the motor to the drum.
Is it worth fixing an old dryer or should I buy a new one?
If the repair cost (parts and labor) is more than 50% of the price of a new, energy-efficient model, it's usually time to upgrade. However, if it's just a belt or a fuse, the part cost is minimal, and a DIY fix can extend the life of your machine by several years.
How do I know if my thermal fuse is blown?
A blown thermal fuse typically results in the dryer spinning but producing no heat. You can verify this using a multimeter set to the ohms setting; if the meter doesn't show continuity across the fuse, it has blown and must be replaced.
Next Steps and Troubleshooting
If you've tried the basic cleaning and the belt looks fine, but the machine still won't work, it's time to look at your specific model's manual. Most manufacturers list "Error Codes" (like F01 or E2) that tell you exactly which sensor is failing. Search for your model number online to find a detailed wiring diagram.
For those who aren't mechanically inclined, start by documenting everything. Take a photo of the wires before you unplug them so you know exactly where they go back. If you get stuck, remember that most appliance parts are standardized; you can often find a replacement part at a local hardware store or online by searching the part number stamped on the original component.
I am an expert in the services industry with a focus on appliance repair. My passion lies in understanding how things work and educating others in simple, engaging ways. This enthusiasm fuels my writing, where I delve into topics around appliance maintenance and troubleshooting. I aim to make these subjects clear and accessible to all readers.