
If your extractor fan's gotten noisy or smells a bit funky, it's probably time to clean the motor. These things suck up more than just air—think grease, dust, and who-knows-what from your kitchen or bathroom. All that stuff clogs up the motor, makes it work harder, and can even burn it out if you ignore it too long.
You don't need fancy tools or special sprays. Most of this can be done with stuff lying around at home: a couple of screwdrivers, maybe a brush, and a cloth or two. Before you start, always unplug the fan or flip the circuit breaker—trust me, you don't want a surprise shock.
One quick tip: Take a photo of the fan’s wiring and layout before you start pulling things apart. It sounds basic, but that picture makes putting things back together way less stressful.
- Why Extractor Fan Motors Get So Grimy
- How to Safely Take Apart Your Fan
- Cleaning the Motor Without Causing Damage
- Pro Tips for Stubborn Buildup and Reassembly
- How Often Should You Clean Your Extractor Fan Motor?
Why Extractor Fan Motors Get So Grimy
Extractor fan motors put in serious work pulling air—and all the stuff hiding in it—out of your kitchen or bathroom. They aren’t just moving steamy air. They’re dragging in a mix of dust, tiny food particles, and oils from cooking or even just daily humidity and hair from a shower. This sticky mess settles right on the blades, the housing, and most importantly, the extractor fan motor itself.
Got a kitchen fan? It's fighting against cooking grease. Even if you hardly fry, oil floats off pans as a vapor, eventually sticking to the fan’s parts. After a few months, the motor’s practically wearing a sweater of sticky gunk. Bathroom fans miss out on the grease, but they catch dust, lint, and other things floating in the humid air. The moisture helps dust clump and glue itself right where you don’t want it.
Look at the numbers. In a 2023 UK study on home appliances, over 68% of kitchen extractor fans inspected were found to have a "moderate to severe" buildup on the motor after just one year. Here’s a rough comparison to break it down:
| Location | Main Sources of Buildup | Typical Grime After 1 Year |
|---|---|---|
| Kitchen | Grease, cooking oil, dust | Heavy, sticky residue |
| Bathroom | Lint, dust, moisture | Dusty, sometimes damp |
Why does it matter? That sticky layer acts like a blanket, holding in heat. The motor works harder, wastes electricity, and wears itself down a lot faster. Overheating causes most fan failures—it’s not some dramatic spark, it’s just years of slow cooking under a pile of gunk.
Bottom line: if your fan’s motor isn’t cleaned regularly, expect it to run loud, work harder, use more power, and die early. A little grime is normal. A lot means it's cleaning time.
How to Safely Take Apart Your Fan
First off, safety is a must. Unplug the fan or shut off its power at the breaker box. Double-check it’s off before you touch anything. Cleaning a live fan motor is a fast track to a very bad day.
Give the fan housing a quick look to spot screws, clips, or plastic covers holding everything together. Kitchen fans might have a greasy filter or metal grill, while bathroom fans often have a plastic shroud. Grab a screwdriver—usually a Phillips or flathead is enough for most models.
- Extractor fan motor units are usually mounted with a few screws. Gently remove the outer cover or grill. Sometimes these covers just snap off, so check for tabs or notches.
- If you see a filter, pull it out. Now you have better access inside. Save those screws in a small bowl or cup—they like to roll away and hide.
- Take a photo of the wiring setup, especially on older fans where color codes might be faded or weird. Having this picture is gold when it’s time to put things back.
- Look for the fan blade or impeller. Most just pull off with a gentle wiggle, but a few are held on with a small screw or a nut. Don’t force anything—if it won’t come off, keep looking for hidden screws or latches.
- Once you’ve removed the blade, you’ll see the main motor housing. Remove any remaining screws holding the motor bracket or housing to the wall or ceiling.
Lay everything out in the order you took it off. This way, reassembly feels less like a puzzle. If you start seeing wires you didn't expect or things look complicated, it’s okay to stop and call in a pro. No shame in that. This is all about cleaning and maintenance, not breaking stuff or risking safety.
Cleaning the Motor Without Causing Damage
Here’s where a lot of people mess up: pouring cleaner straight onto the extractor fan motor or dunking parts in water. That’s a quick way to kill the motor. These things hate moisture, and even a bit of spray can rust the coils or short the electronics.
Start by grabbing a dry, clean paintbrush or a soft toothbrush. Use this to loosen built-up dust and gunk from all the little nooks. You’ll see the most buildup on the fan blades, around the shaft, and the ventilation holes. Work the brush gently—don’t jam bristles into parts or force anything.
- Tap out loose dust onto a newspaper or towel. If possible, take the motor outside for this part. Kitchen grease can get gross.
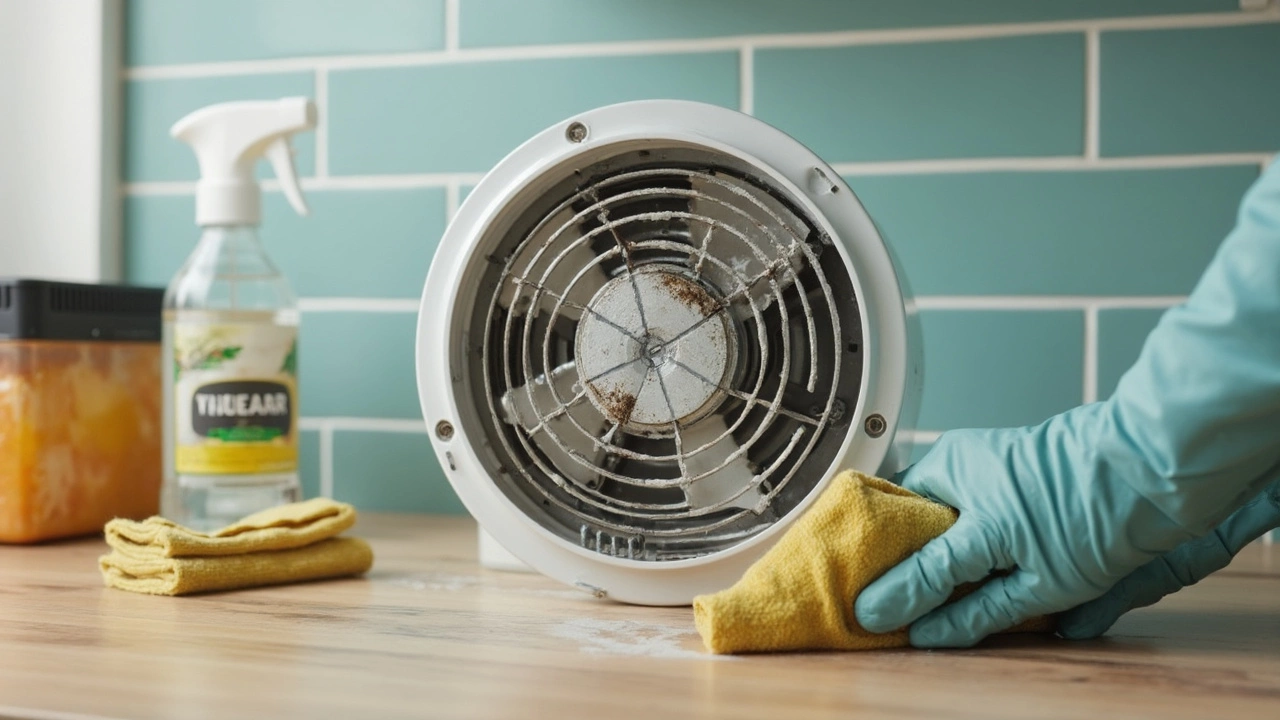
- After dry brushing, take a microfiber cloth, slightly dampen it (not dripping), and wipe away stubborn residue. Only use water or a tad of mild soap—never use sprays directly on the motor. Stay away from strong cleaners, especially those with ammonia or bleach.
- If you spot greasy buildup, dip a corner of your cloth in white vinegar. Vinegar cuts through grease but dries fast and won’t fry the wiring. Again, use very little—just enough to wipe, not soak.
- Check for any gunk jammed under the motor spindle. Use a cotton swab (barely damp) to clear it out. If it feels stuck, don’t force it or jam anything metal inside. It’s better to leave a little behind than to bend a part.
- If you’ve got a can of compressed air, give the motor vents a quick spray to finish off any hidden dust.
Still sticky? A lot of repair guys swear by using a soft brush and rubbing alcohol for tough grime, but always put the alcohol on the cloth, not directly on any part.
| Do | Don't |
|---|---|
| Dry brush first | Splash water or cleaner on the motor |
| Use a low-moisture cloth | Soak or submerge motor parts |
| Take photos for reassembly | Lose or misplace tiny screws |
| Let the motor dry fully before reassembling | Rush reassembly if anything is still damp |
It’s simple: be gentle, use very little moisture, and keep all liquids off the actual wiring. Once everything’s wiped down and air-dried, your fan's motor should be good to go. Usually, these motors last years longer if cleaned just once or twice a year.
Pro Tips for Stubborn Buildup and Reassembly
Some extractor fan motors look like a grease magnet. If you’re staring down a caked-on mess that won’t budge, don’t panic. You’ll want to keep things simple but effective, so here’s what actually works.
- Bake the parts—not the motor—in hot, soapy water. Fan covers, blades, and non-electrical bits respond best to a good soak. Ten to fifteen minutes usually does the trick.
- If you hit really stubborn grime, try an old toothbrush or a soft paintbrush for detail spots. Stiff brushes might scratch the plastic or bend delicate fins.
- For the motor itself, skip the water and go for a microfiber cloth slightly dampened with rubbing alcohol or a little degreaser. Avoid spraying anything directly onto the motor; you don’t want liquid inside the moving parts.
- Compressed air is a handy backup. A few short blasts will dislodge dust where your cloth can’t reach.
- Quick fact: Motors packed with gunk can overheat. Just 3-5mm of sticky buildup can raise the running temperature by 20%. If things look bad, you’re saving your fan’s life by cleaning now.
Now, about putting it all back together—this is where people sometimes trip up. Here’s what helps keep it simple:
- Refer to that photo you took before you started (seriously, it saves headaches every time).
- Dry every part completely—moisture and motors are a bad mix.
- Check all wiring for loose connections or wear before snapping everything back in place.
- When reattaching the cover or grill, don’t force it. If it won’t line up, something’s probably backwards or twisted. Try again gently.
Want numbers? Here’s a quick overview of what people run into with dirty fan motors:
| Problem | How Often Reported (%) |
|---|---|
| Noise or vibration | 65 |
| Reduced airflow | 70 |
| Overheating/smell | 35 |
| Complete motor failure | 15 |
The extractor fan motor will work better, last longer, and you’ll avoid nasty surprises if you stay on top of this basic care.
How Often Should You Clean Your Extractor Fan Motor?
It’s easy to forget about your extractor fan motor until things get noisy or you notice less airflow. But waiting that long isn’t a great idea. Regular cleaning keeps it running smooth, helps prevent breakdowns, and actually saves you money in the long run.
Most kitchen extractor fan motors should be cleaned every 6 to 12 months. If you cook a lot of greasy food or live in a dusty area, check it on the shorter end of that range. Bathroom fans dealing with steam and dust usually only need a good clean once a year unless you see lots of buildup.
| Environment | Recommended Cleaning Interval |
|---|---|
| Busy kitchen (daily cooking, lots of oil) | Every 6 months |
| Average kitchen | Every 12 months |
| Bathroom (typical use) | Every 12 months |
| High-dust environment | Every 6 months |
Quick way to check? If you shine a flashlight and see thick dust or sticky gunk—don’t wait for your calendar, it’s cleaning time. Some brands say their motors can run for 18 months between cleanings, but that's rarely true for extractor fan motor units above a stove or in busy bathrooms.
For rental properties, landlords in the UK usually clean fans once a year, but if yours sounds worse, take a look. A bit of care now can dodge motor failure, which often means replacing the whole fan, not just one part.
- Mark a reminder on your phone or calendar for a yearly checkup.
- Clean removable filters every 2-3 months, since that helps keep the motor cleaner longer.
- If the fan ever sounds rough or struggles, open it up and inspect the motor, even if it’s a bit early.
I am an expert in the services industry with a focus on appliance repair. My passion lies in understanding how things work and educating others in simple, engaging ways. This enthusiasm fuels my writing, where I delve into topics around appliance maintenance and troubleshooting. I aim to make these subjects clear and accessible to all readers.