Bathroom Fan Size Calculator
Select your bathroom dimensions to find the right fan size for proper ventilation.
Recommended Fan Size
Based on your bathroom dimensions
Enter your bathroom dimensions to see results
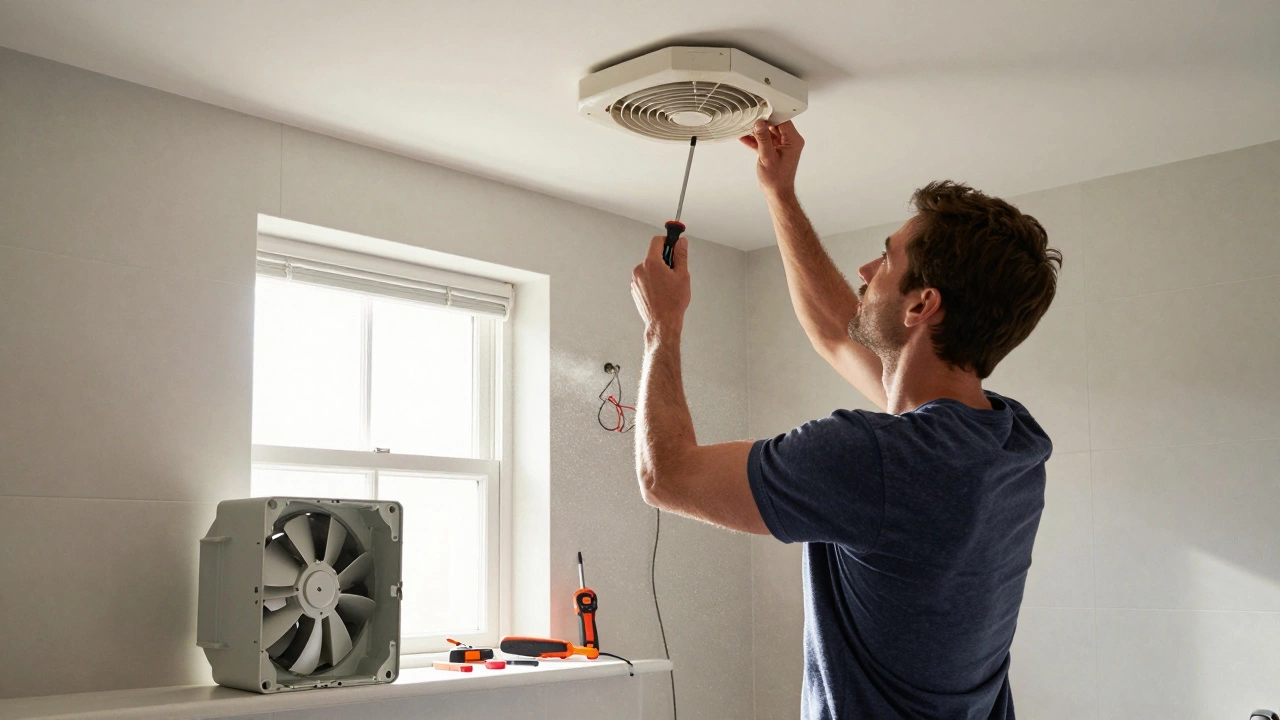
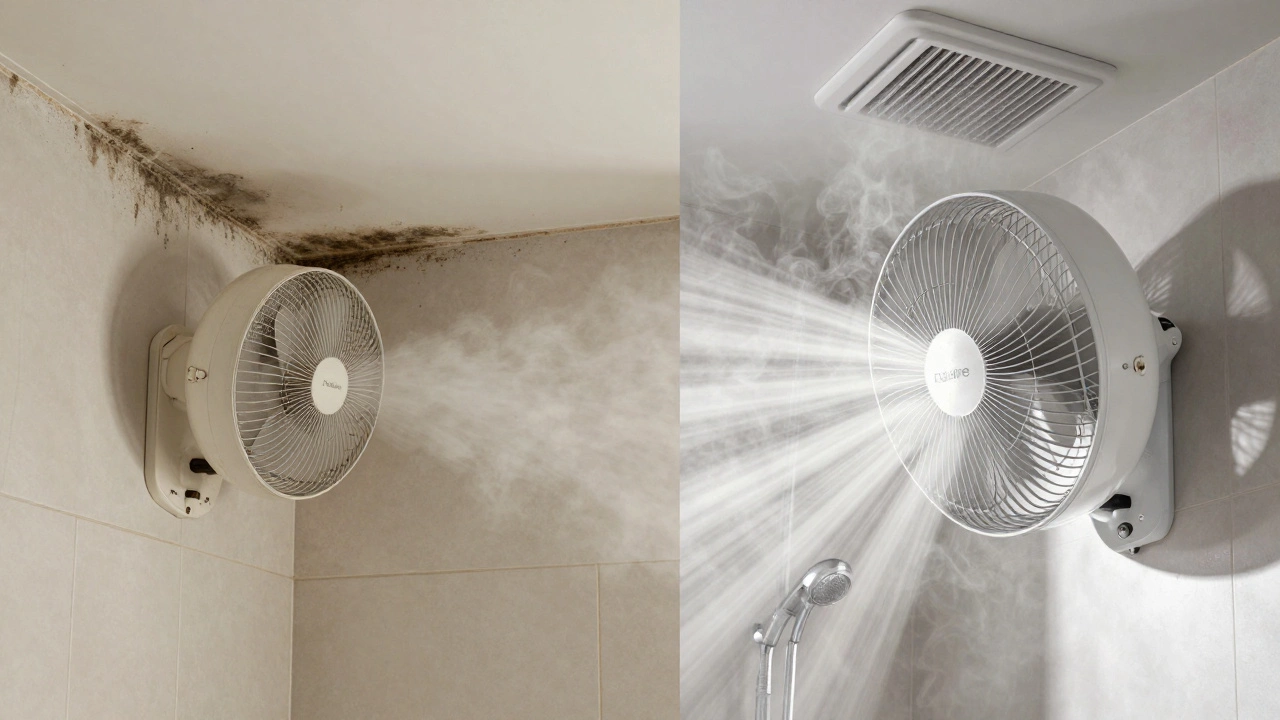
Replacing a bathroom extractor fan isn’t as scary as it sounds. If you’ve ever stared at a noisy, rattling fan or noticed mold creeping up the walls because the air never clears, you know how much of a difference a working fan makes. The good news? Most homeowners can swap out an old extractor fan in under two hours-with no special tools and no electrician. But it’s not always plug-and-play. Let’s cut through the hype and show you exactly what to expect.
What Makes a Bathroom Extractor Fan Hard to Replace?
The biggest hurdle isn’t the fan itself. It’s the space around it. Older homes often have fans tucked into tight ceiling cavities, buried under insulation, or wired into circuits that weren’t meant for modern units. If your fan is mounted directly into the ceiling joist with no access panel, you’ll need to cut a new hole. That’s doable, but it adds time and risk.
Another common issue: outdated wiring. If your house was built before 2000, the fan might be wired directly into the lighting circuit, meaning turning off the light kills the fan. Modern fans need their own switched circuit or a humidity sensor. If you’re replacing with a smart fan that needs a neutral wire, you might hit a wall-literally. Older wiring boxes often lack a neutral, and running a new cable through walls is a job best left to an electrician.
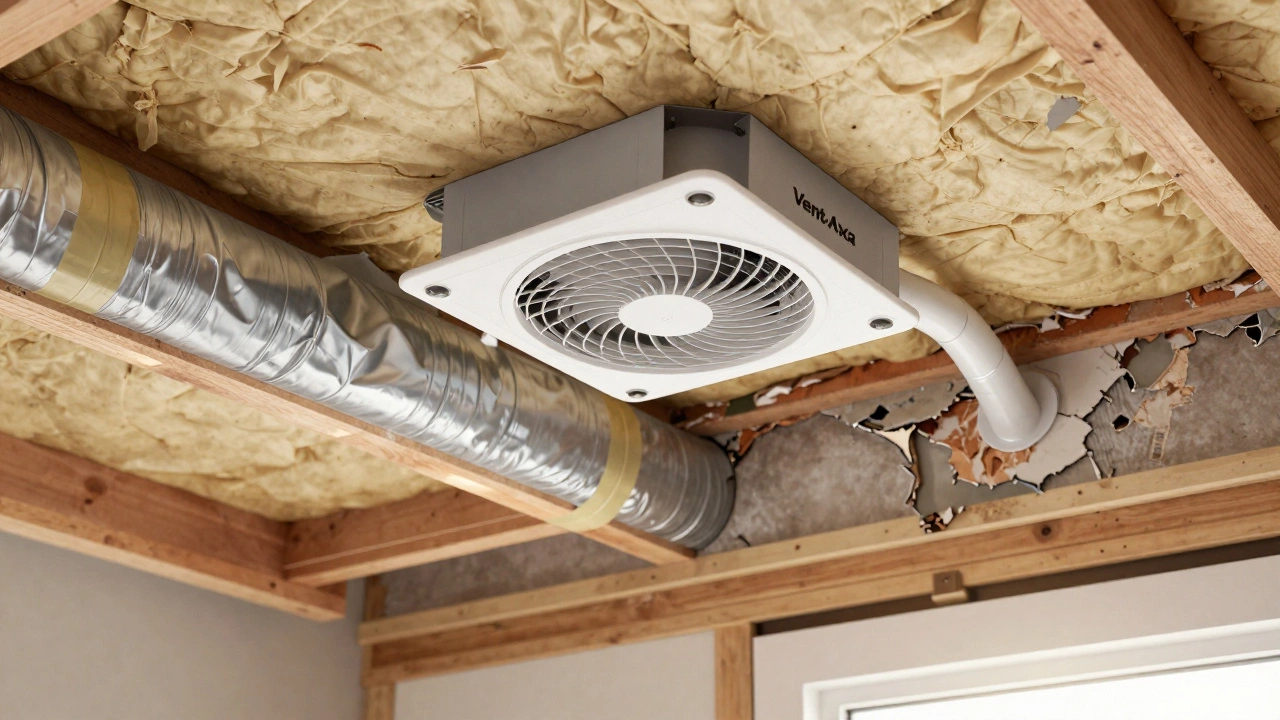
Then there’s the ductwork. If the duct runs through the attic or under the floor, and it’s been crushed, disconnected, or sealed with duct tape (yes, people still do this), you’ll need to fix that too. A poorly connected duct is worse than no fan at all-it just pushes moist air into your walls instead of outside.
What Makes It Easy?
Most modern extractor fans are designed for drop-in replacement. If you’re swapping an old fan for a new one of the same size and mounting style, you’re in luck. Brands like Axis, a UK-based manufacturer of quiet, energy-efficient bathroom fans, Vent-Axia, a leading brand in residential ventilation systems since 1935, and Nuaire, a trusted name in UK ventilation with over 60 years of experience make units that fit standard 150mm or 200mm round holes. You just unscrew the old one, unplug the wires, disconnect the duct, and bolt the new one in.
Many new fans come with mounting brackets that snap into place. No more fumbling with awkward screws. Some even have quick-release clips for the grille. If your old fan had a pull-cord switch, you can usually reuse the same switch. No rewiring needed.
And here’s the real win: today’s fans are quieter, more efficient, and often come with built-in timers or humidity sensors. You don’t have to turn it on manually. It kicks in when the air gets damp and shuts off automatically. That’s not just convenience-it’s mold prevention.
Tools You Actually Need
You don’t need a toolbox full of gear. Here’s what you’ll use:
- Phillips screwdriver (or a cordless drill with a bit)
- Wire strippers or a utility knife
- Non-contact voltage tester (critical for safety)
- Measuring tape
- Masking tape and a pencil
- Flashlight (for checking the ceiling cavity)
- Stiff brush or vacuum (to clean dust out of the duct)
That’s it. No drywall saw, no ladder, no power tools beyond a drill. If you’re replacing the fan with the same model, you won’t even need to cut anything.
Step-by-Step: How to Replace It
- Turn off the power at the circuit breaker. Don’t just flip the light switch. Use a non-contact voltage tester on the wires to confirm there’s no current.
- Remove the fan grille. Most snap off with a gentle tug. Some have small screws around the edge.
- Unscrew the fan unit from the ceiling. You’ll likely see two or three screws holding it in place. Hold the fan as you unscrew-some are heavy.
- Disconnect the wires. Take a photo of the wiring before you unplug. Match the colors: brown to brown (live), blue to blue (neutral), green/yellow to green/yellow (earth).
- Unclip or unscrew the duct from the back of the fan. If the duct is brittle or covered in dust, clean it out now. Replace it if it’s cracked or disconnected.
- Take the old fan to the store. Bring the model number if you have it. Most replacements are sold by size, not brand. A 150mm fan fits most UK bathrooms.
- Install the new fan. Connect the duct first, then the wires. Double-check your photo. Secure the fan to the ceiling with the provided screws.
- Reattach the grille. Turn the power back on. Test it. You should hear a quiet hum-not a buzz or rattle.
When You Should Call a Professional
Don’t try this if:
- You’re not comfortable working near live wires-even if you turned off the breaker.
- The fan is wired into a shared circuit with other rooms.
- The duct runs through a cavity wall or under a floor and you can’t access it.
- You’re replacing a fan with a smart model that needs Wi-Fi or a neutral wire, and your box doesn’t have one.
- The ceiling is plasterboard and you’re worried about cracking it.
In those cases, hire a Part P-certified electrician. It’s not expensive-usually £80-£150 including parts. But doing it wrong could mean rewiring your whole bathroom or causing moisture damage that costs thousands to fix.
What to Look for in a New Fan
Not all fans are created equal. Here’s what matters:
- Flow rate: Look for at least 15 litres per second (L/s) for a standard bathroom. Larger bathrooms need 20+ L/s.
- Noise level: Aim for 30 decibels or lower. Anything above 40 dB sounds like a vacuum cleaner.
- Humidity sensor: This is the best feature. It turns the fan on automatically when steam rises.
- Timer: Lets the fan run for 5-20 minutes after you leave the room.
- Energy rating: A+ or A++ means lower bills over time.
- IP rating: IPX4 or higher means it’s splash-proof. Essential for bathrooms.
Brands like Axis and Vent-Axia offer models that meet all these standards. You can get a decent unit for £60-£100. Skip the £20 no-name brands-they’re louder, less reliable, and often don’t last two years.
Common Mistakes People Make
Here’s what goes wrong:
- Using duct tape on the duct. It dries out, cracks, and leaks. Use foil tape or metal clamps instead.
- Not sealing the gap around the fan. Air leaks from the ceiling cavity into the bathroom. Use expanding foam or insulation strips.
- Installing the fan backward. The airflow arrow on the unit must point toward the outside. If it points toward the room, you’re blowing steam into the attic.
- Forgetting to clean the duct. Dust buildup reduces airflow by up to 50%. Clean it before installing the new fan.
- Buying a fan that’s too small. A 100mm fan won’t handle a large bathroom. Measure the hole, not the old fan.
How Long Does It Take?
If everything lines up-same size, same wiring, clean duct-you can do it in 60-90 minutes. If you’re cutting a new hole, rerouting ducts, or dealing with old wiring, plan for 3-4 hours. Most people underestimate the time it takes to fish a duct through a tight space.
One homeowner in Manchester replaced her 1980s fan in 72 minutes. She had the right tools, a clear ceiling cavity, and a new fan that fit perfectly. Her old one was so clogged with dust, the motor had overheated. The new one cost £85. She saved £200 by doing it herself.
Final Verdict
Are bathroom extractor fans easy to replace? Yes-if you’re prepared. If you’re handy with a screwdriver, understand basic wiring, and don’t mind getting dusty, it’s one of the easiest DIY home repairs you can do. It’s cheaper than replacing a toilet, faster than installing a new shower, and gives you immediate results: no more foggy mirrors, no more mildew smell, no more waking up to damp walls.
But if you’re unsure about the wiring, the duct, or the size, don’t guess. Take the old fan to a hardware store. Ask for help. Or call a pro. It’s not a job to rush. A bad installation can cost you more than the fan ever did.
Can I replace my bathroom extractor fan without turning off the electricity?
No. Always turn off the power at the circuit breaker before touching any wires. Even if the fan is controlled by a switch, the wiring might still be live. A non-contact voltage tester is the only safe way to confirm the power is off. Skipping this step risks electric shock.
Do I need a fan with a humidity sensor?
Not strictly, but it’s the best upgrade you can make. Manual fans are often left off because people forget to turn them on. A humidity sensor turns the fan on automatically when moisture levels rise-usually within seconds of a shower. It runs for a set time after the room dries out. This prevents mold without any effort from you.
Can I use a fan from a different country?
Only if it’s certified for use in the UK. Fans from the US or EU may have different voltage (110V vs 230V), plug types, or lack the required IP rating for bathrooms. Always check for UKCA or CE marking and ensure the fan is rated for use in Zone 1 or Zone 2 of a bathroom (near the shower or bath).
Why does my new fan make a buzzing sound?
A buzzing noise usually means the fan isn’t mounted securely. Check that all screws are tight and the unit isn’t vibrating against the ceiling or duct. It could also be a faulty motor-especially if it’s a cheap model. Try tightening the mounting bracket or adding rubber padding between the fan and the frame. If it persists, return the unit.
How often should I clean the extractor fan?
Clean the grille every 3 months. Use a damp cloth or vacuum. Every 1-2 years, remove the fan and clean the duct with a brush or vacuum. Dust buildup reduces airflow and forces the motor to work harder, shortening its life. If you notice reduced airflow or louder noise, clean it sooner.
I am an expert in the services industry with a focus on appliance repair. My passion lies in understanding how things work and educating others in simple, engaging ways. This enthusiasm fuels my writing, where I delve into topics around appliance maintenance and troubleshooting. I aim to make these subjects clear and accessible to all readers.